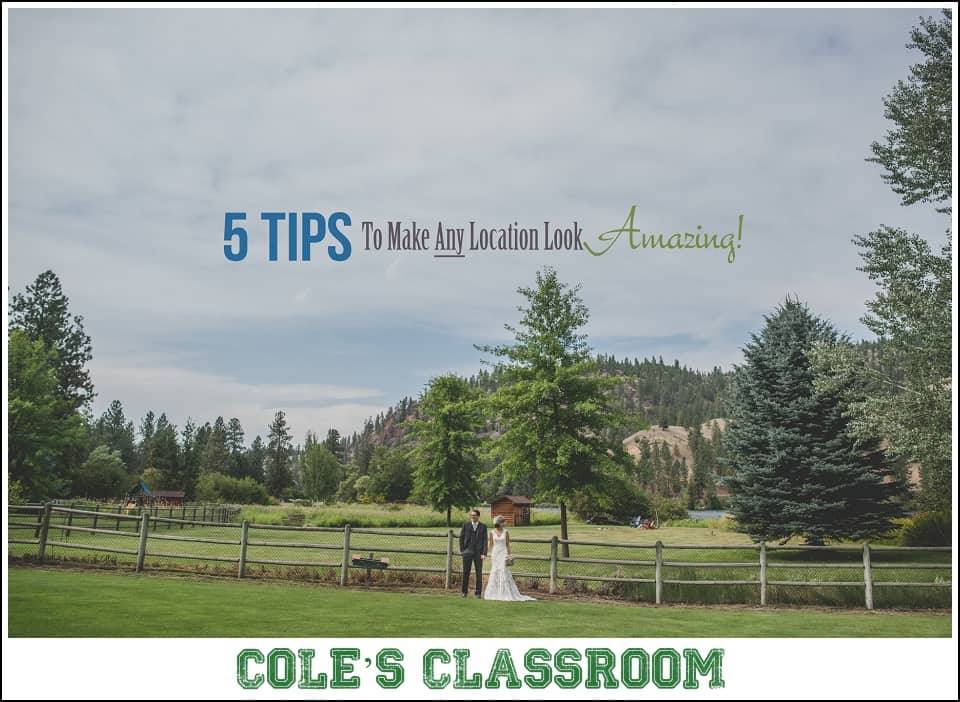

Let’s face it, it’s often a sigh of relief when we arrive at our photo location and it’s a photographers paradise, right? We instantly know that our job is going to be just a tad bit easier given our “location perfection.” Unfortunately, it doesn’t always work out that way and it is our job, as the professional, to give your clients amazing photos under all conditions – not just the “easy” ones. By the end of this post you will learn my 5 tips to make any location look amazing!
Note – all photos by Cole Joseph Photography and edited in Lightroom with my newest Endless Elegance Lightroom Film Presets Collection.
1. Shoot Longer – Are you in a crazy cluttered getting ready room for the bride and her bridesmaids? Are you in a reception hall with florescent industrial lights and exposed pipes everywhere? Like I just was yesterday… If so, ditch the wide angle and shoot longer lenses. Shooting longer focal length lenses will do two important things, first, it narrows your field of view so naturally you will do a good job at hiding those problem areas and second, you will have less depth of field (compared to a wider angle lens) so you’ll be able to blur out unwanted background areas more effectively.
[ad id=’1′]
2. Wide Open Primes – Speaking of depth of field, another reason why I love prime lenses so much is the creative options it provides me, most notably, the ability to shoot wide open at f/1.4 or f/1.8 when I need to really blur out distracting or unwanted background elements. Shooting longer lenses is great, but sometimes you don’t have the luxury of room and you need a wider lens, being able to shoot wider, but still with minimal depth of field is huge.
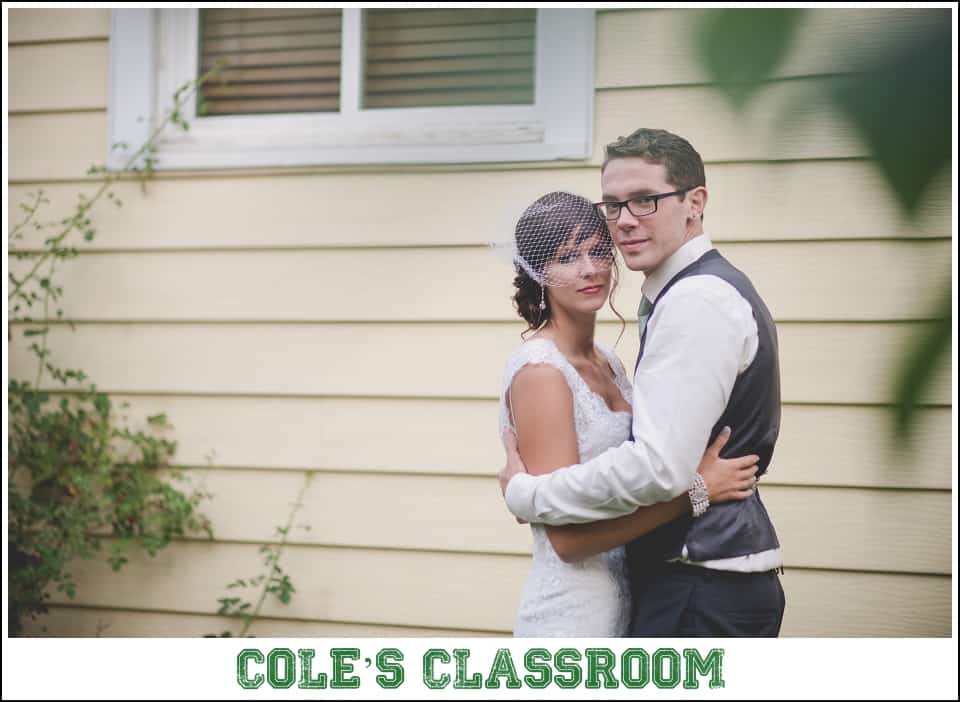
3. Layers with Nature – One of my favorite tricks to add creative elements to our photos when outside is layering your photos with natural elements. You can layer with anything really, it doesn’t have to be shooting through green leaves as I have down below, but the premise is the same – to use nature to help add an element of creativity and composition while using it to block any unwanted elements in the background. This photo below was taken yesterday when our absolutely picture perfect riverside wedding venue was blown away right after the ceremony by a rogue thunderstorm (and lots of wind). It was an unfortunate situation where we were left to take some photos elsewhere, in a not so picturesque place. This photo was taken between two houses in their neighborhood.
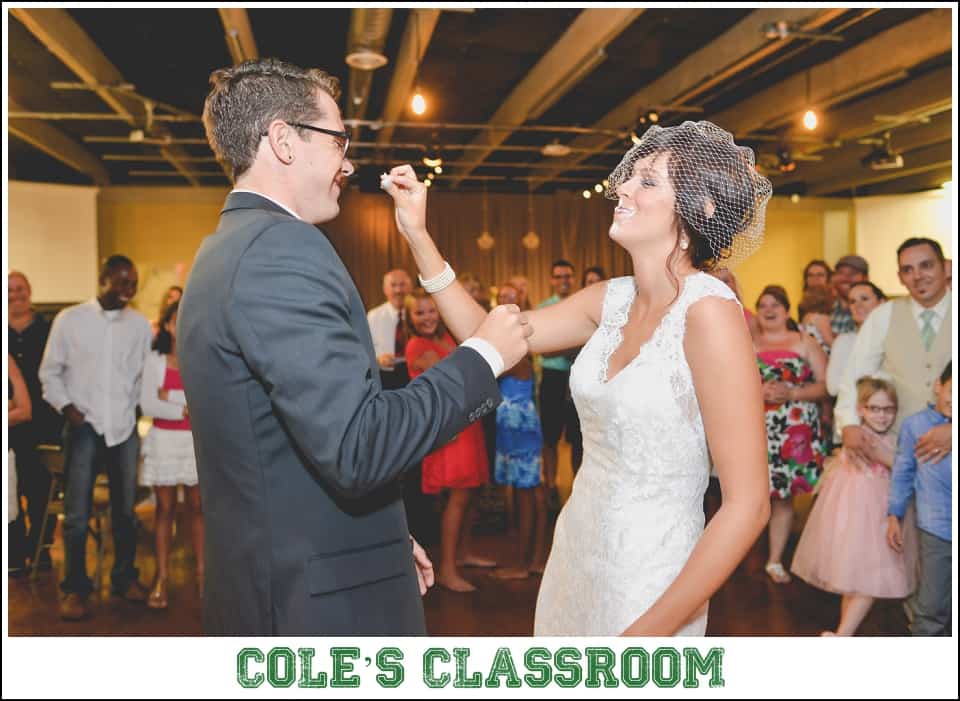
4. Off Camera Flash to Add Room Dynamics – Being able to effectively add lighting and ambiance to a less than perfect room can really do wonders. After our gorgeous wedding venue was blown away, we were forced to relocate to a nearby church as a complete last minute backup plan. As you can see from the photos below, turning the bright florescent lights off and simply using the minimal ambient lighting and shooting into my off camera flash turned this church room into a downright good looking reception venue! The off camera flash really helps with adding shadows and of course, light but you can also help make the room look better with my favorite wedding “party dancing” effect as shown in the lower right – click here for a video tutorial on that. For some super easy off camera flash tips and tutorials, click here and here.

5. Create the Background – If you are a wedding photographer you might find yourself in this position more so than other photographers but basically the idea is, be mindful of your background and if you have a way to make the backdrop nicer, then do it. Here is a specific example to make my point. At our wedding mentioned above, they were ready to cut the cake. Someone thought it would be best to move the cake from the cake table up to the head table, which was high on a stage. I knew that, being that high up I wouldn’t have a flattering angle (shooting up is almost never good) and also since there were curtains behind the stage, we’d have to contend with some shadows behind them. So I requested they cut the cake at the dessert table. But I didn’t want them to be on the other side of the dessert table, which a red wall and pipe behind them, that’s where I was going to stand so that we could have all of their guests in the background as they cut the cake – which is always a far better background than a bleak and meager wall. While they likely didn’t understand my reasoning for requesting a location change for the cake cutting, I know when they see the photos with their family and friends in the photo looking on, they will be completely glad they trusted me. Adding their own guests into the background not only gave a personal twist to the photo but it adds context and character.
So next time you are faced with a less than ideal photo location, keep these 5 tips in mind and I know that you’ll be ready to take on the location and make major improvements towards creating amazing photos for your clients in any location!
Got a question for me? I’d love to hear from you so let me know!
Cole