
If you’re not already familiar with using Tone Curve in Lightroom, you probably feel pretty comfortable using the sliders for highlights, shadows, blacks, and whites in the Basics panel. While it’s easy to assume these two tools do the same thing to your images, the tone curve tool can take your photo editing to the next level.
Looking to improve your photography? Just enter any questions you have about improving your photography below and hit send and get answers & feedback instantly - for FREE! Submit QuestionsSo, what is Tone Curve in Lightroom? How can you use this tool to change your photos’ mood and create a unique editing style of your own?
In this article, we’ll answer all of these questions and more. As you grow and become more proficient with the Adobe Lightroom tool, you’ll want to understand the Lightroom Tone Curve feature to have better control over the final product of your images.
Once you’ve got it down, you’ll be amazed at what you can do, from using the Lightroom tone curve tool with presets to creating your very own tone curve.
Tone Curves: What Are They?
The tone curve of a photo is also known just as the “curves” to many photographers. In Lightroom, the tone curve feature is a powerful editing resource that can adjust the overall contrast and brightness of an image, affecting its whole mood.
Tones include shadows, darks, mid-tones, lights, and then highlights. All of these are adjusted with the RGB curve. Colors can also be adjusted with the Tone Curve Lightroom tool using individual red, green, or blue curves.
What You Can Do With Tone Curve vs. With Basic Tone Sliders
As we touched on in the opening, many people assume that the Tone Curve and Basic sliders do the same thing. While they create similar results, they’re separate tools that work differently.
If you want to adjust the image itself, you’ll use the Basic sliders and adjust the image’s data. These changes can become rather drastic, especially if you’re using a RAW image. Essentially, the Basic sliders will allow you to adjust the baseline levels of the photo.
The Lightroom Tone Curve feature, on the other hand, manipulates the tones of the image data to alter the values that are already present in the image.
Want to see the difference between the Basic sliders and the Tone Curve Lightroom in action for yourself?
Make some minor curve adjustments to an image with the Basic Tone sliders and then look at the image’s histogram. You’ll see that you’re altering the baseline data of the image.
Now, find the Lightroom Tone Curve tool to the right of the Develop Module. You’ll find both the color curves and tone curves within the same panel. Play around with the Tone Curve, and you’ll notice that you’re not making any changes to the baseline image data. There should be no changes to the histogram.
Want an easy way to keep the two straight? Remember it this way:
Use the Basic Tone sliders when you need to correct the image exposure.
Use the Tone Curve tool to correct the tone and information that already exists in the image.
Far too often, people will try to correct exposure with the Lightroom Tone Curve feature. Just the same, they’ll also miss out on the benefits of Tone Curve to correct contrast by only using the Basic sliders.
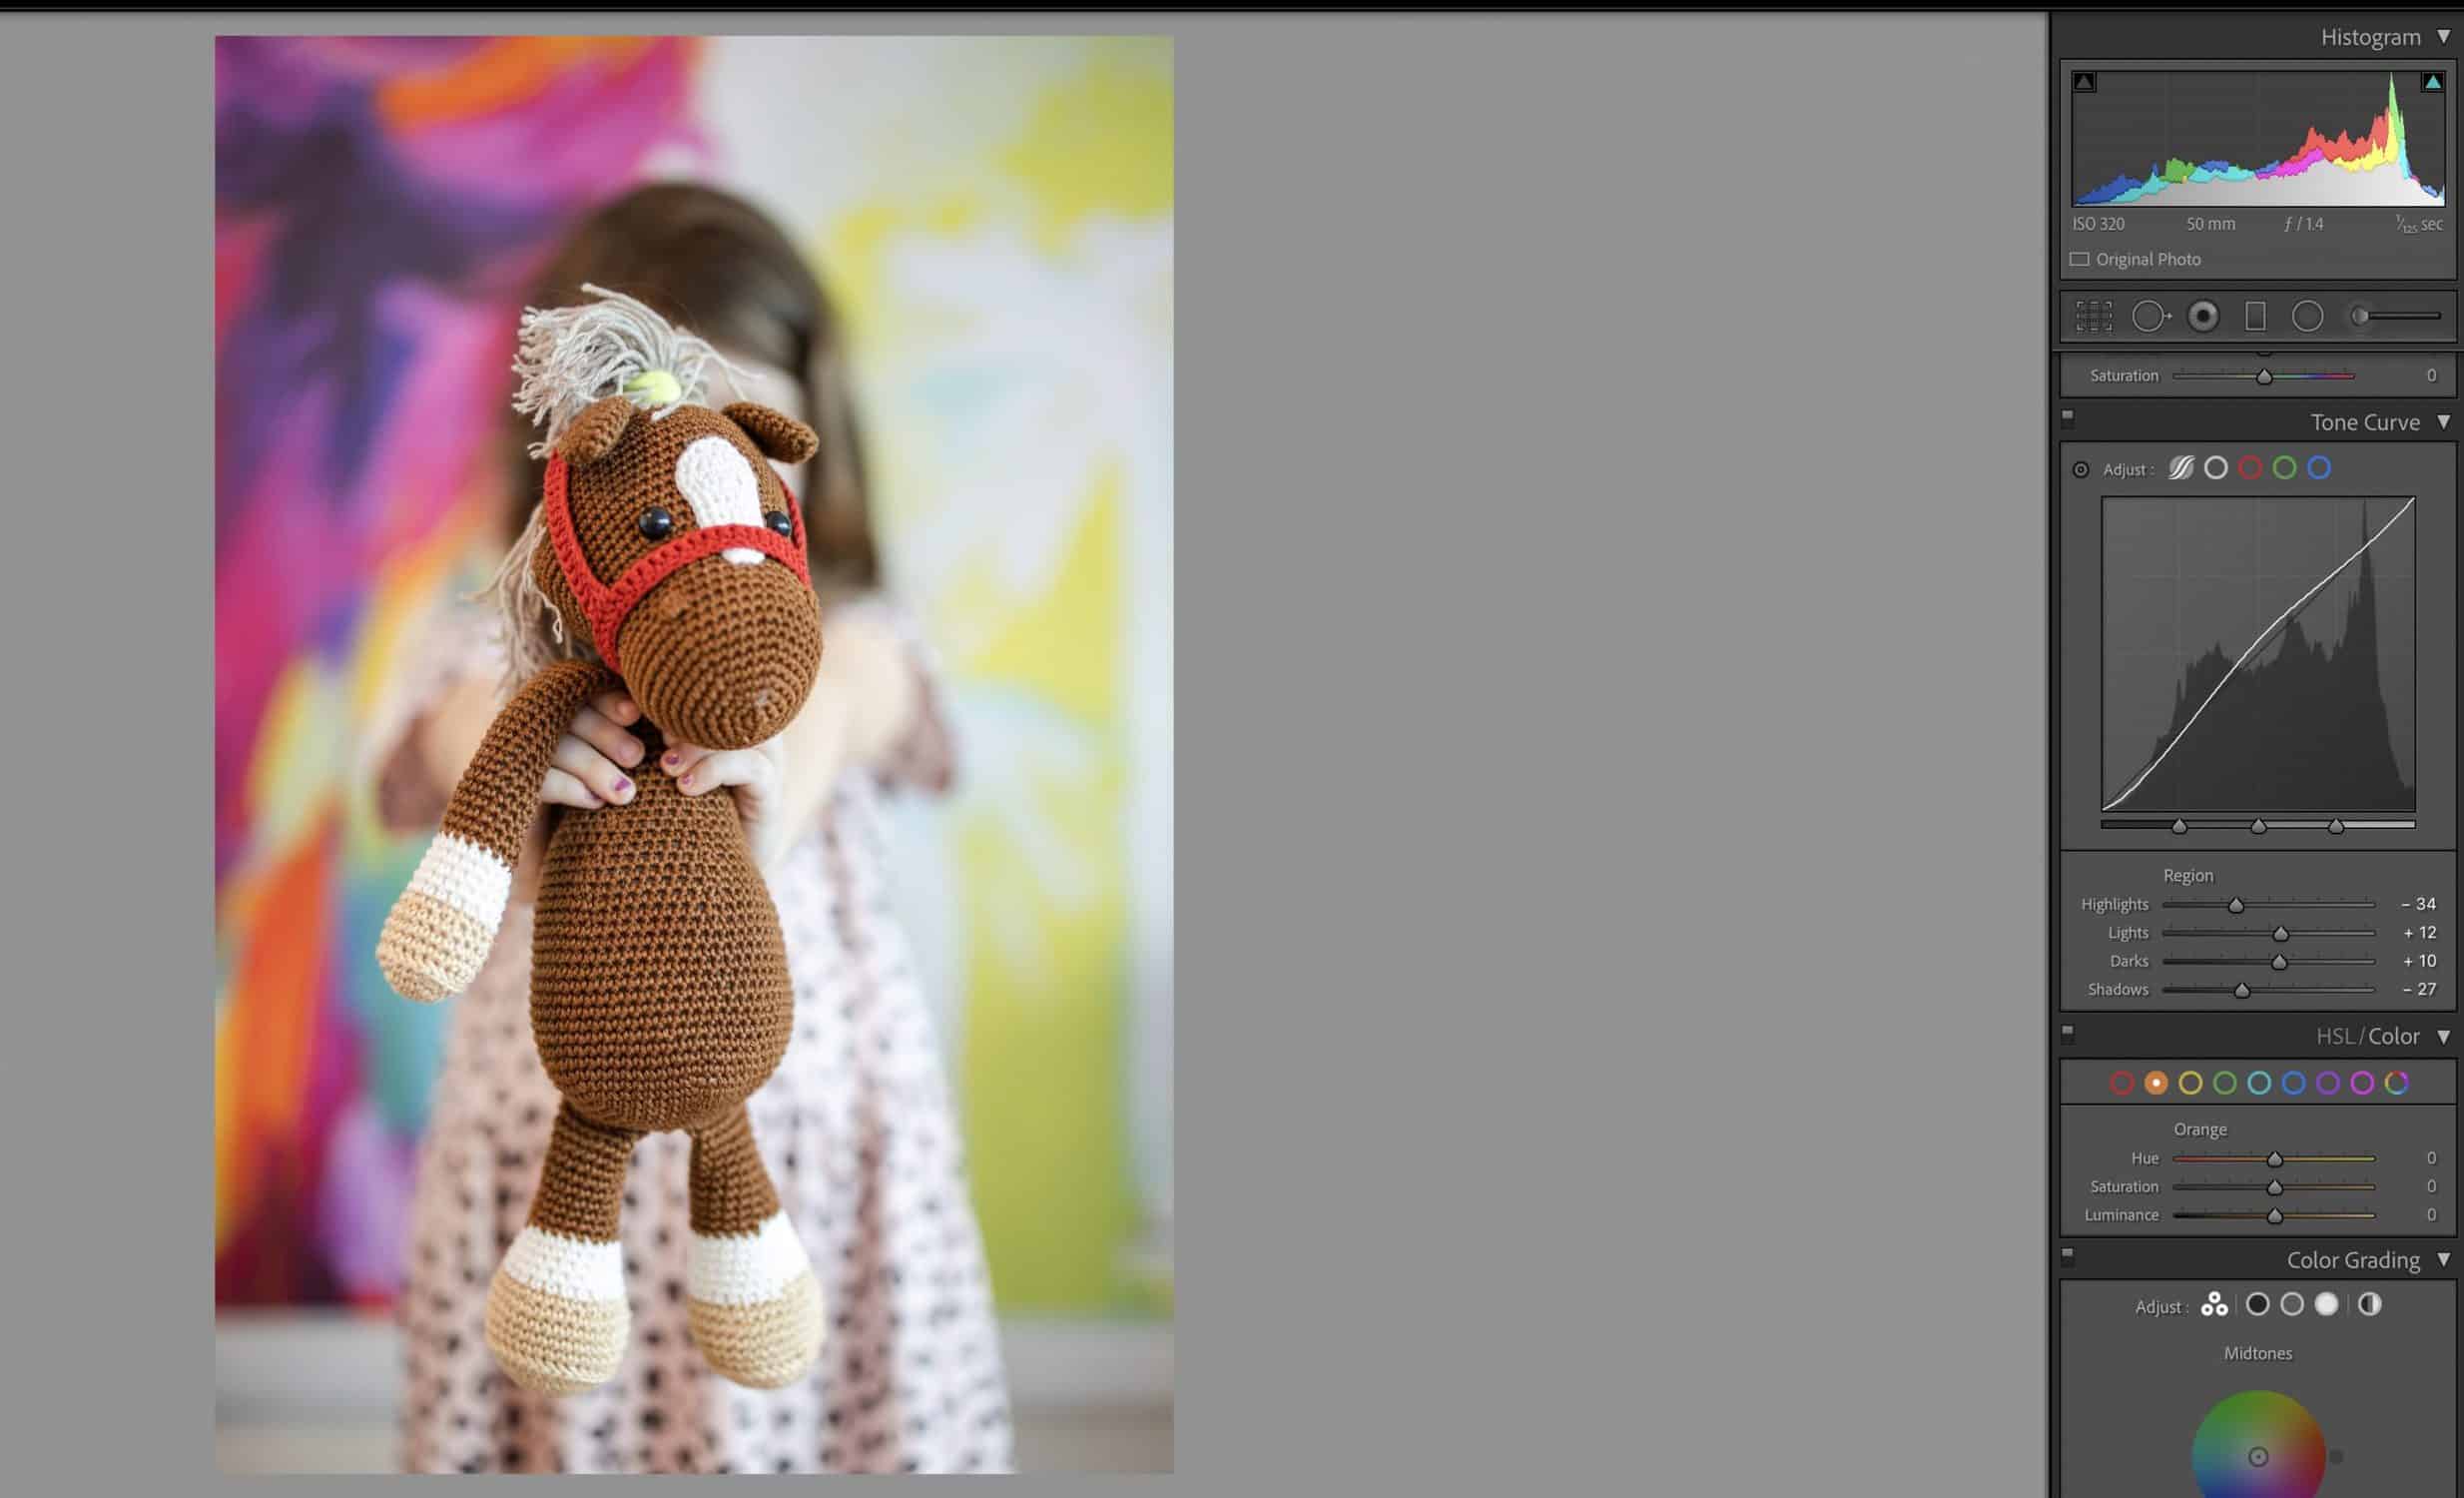
Key Components of Lightroom Tone Curve Panel
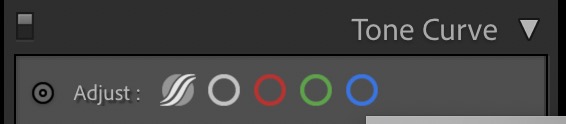
Within the Lightroom Tone Curve panel of the Develop module, you’ll find several icons. To better understand how to use this tool, let’s look at what each of these icons means.
At the top left of the panel, you’ll see two small triangles sandwiching a small circle. If you click this, you’ll be able to adjust a specific area on the image by placing your cursor over the part of the image you want to change. Then, you’ll be able to change the values of that specific region. You can adjust the shadow or the highlights, whatever suits you.
For example, if you want to brighten up some shadowed areas, you can hover your cursor over that spot and click. Then, go over to the Tone Curve Lightroom panel and light the curve higher so you can boost the brightness. After making this change, you’ll see a slight arc to the tone curve.
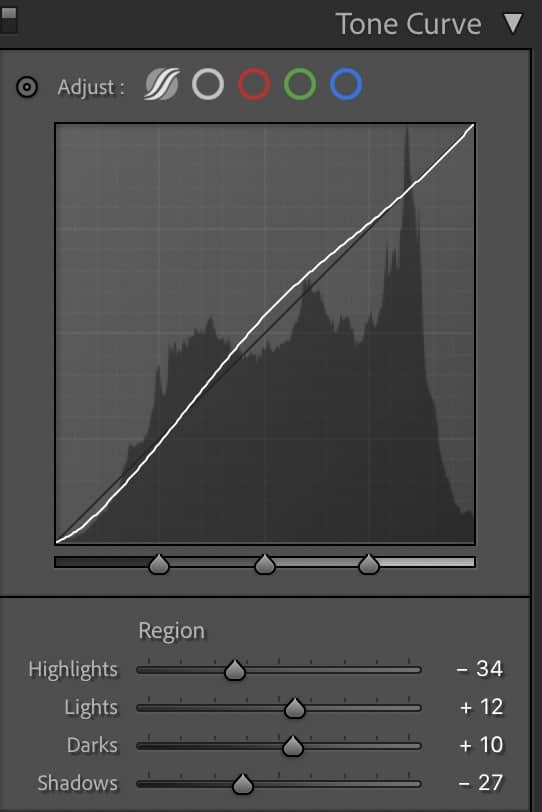
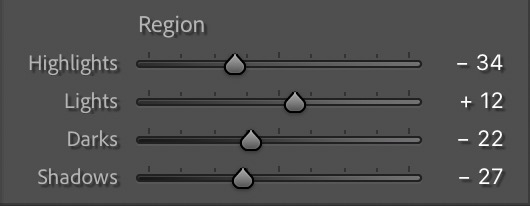
Below the tone curve graph, you’ll see sliders for highlights, lights, darks, and shadows. You can adjust the tone curve by individually changing these sliders.
If you want to see how certain areas of the curve are impacting your image, you can hover your mouse over it, and you’ll see that either the highlights, the lights, the darks, or the shadows are impacted. The bottom of the curve controls the shadows. The top of the curve controls the highlights, and so on.
If you want to adjust the tone curve separately from the sliders, look to the panel’s bottom right for a small icon that looks like an upward curve – this is the Edit Point Curve tool. From here, you can change the tone curve by clicking on the line and dragging it either upward to brighten the image or downward to darken it.
You should also check out the Point Curve presets. You’ll see Linear, Medium Contrast, and Strong Contrast options. Note that Linear is the default.
Using the Tone Curve in Lightroom
Understanding how to use the Tone Curve in Lightroom, let’s explore how you can use this tool to change your curve photography in Lightroom. We’ll cover everything about using the Tone Curve from manipulating the RGB channels to color balancing and adjusting the tone curve with presets.
Manipulating RGB Channels
When you’re in Point Tone Curve mode, you’ll see a “Channels” setting that will allow you to manipulate Red, Green, and Blue tones individually. You can also generally manipulate all tones with the inclusive RGB setting.
If you want to grow in your Lightroom skills, you’ll likely find this particular feature incredibly helpful.
Not only is this tool fantastic to correct colors, but it can also be used in tons of different ways. Think split toning, completely removing colors, clipping colors, and placing a colored wash over images.
Many photographers prefer to use the RGB channels to split tones. What does this mean?
While you can split tones using the program’s dedicated feature, you can also create your own split tones with the RGB feature.
All you need to do is create anchor points surrounding the desired range. Then, place another anchor point where you want to either decrease or increase the range.
Using Adjustment Point Picker
Whether you decide to use the Point Tone Curve feature or the Region-based tool, you’ll find an adjustment point picker in the top left corner of the module.
With the adjustment point picker, you can directly manipulate any specific point within the image. As you change values, you’ll be adjusting the exact spot you’ve selected.
What’s great about this tool is that it gives you the chance to manipulate quickly – it even works for individual RGB channels.
Keep this tool in mind if you want a quick and easy way to adjust the tone curve.
Color Balancing
To adjust your image’s color balance, you can click on the Edit Point Curve feature mentioned above. See the word “channel”? Click the up or down arrows there. You’ll see that the default is the RGB channel, as well as the individual color channels.
First, let’s select red. Pull the curve around, and you’ll see the image change. If you pull it upward and left, you’ll add more of that color to your image. If you pull it down and right, you’ll remove that color from your image. It works the same for all color channels.
The bottom line is that pulling up on the curve increases that color channel while pulling down on the curve will decrease its presence.
Adjusting Tone Curve After Applying Presets
You’ll likely find yourself using the tone curve on your images after applying presets at least a time or two. To do this, first, apply your preset as normal.
Want to play down the red your image has with the preset applied? Hop over to the Lightroom Tone Curve module and look at your current curve on the red channel.
You may see a slight S-shape to the curve. To reduce the red, go ahead and slide certain anchor points of the curve to create a straighter diagonal line without any S-shape.
Creating Your Own Tone Curve
Before we share the details you’ll need to create a custom tone curve, let’s touch on how you can experiment with linear presets and linear regional sliders.
Linear Presets
You can select either the medium contrast or strong contrast option by clicking on the up and down arrows next to the Point Curve tool. You can select your option from the drop-down box that pops up.
Linear Regional Sliders
If you’re still getting your feet wet with Tone Curve in Lightroom but still want to exert some control over your image, the regional sliders are a great way to start.
You’ll find these within the Linear Tone Curve panel. You can slide highlights, lights, darks, or shadows until your image is to your liking.
From Linear to Custom Tone Curve
If you’re ready to jump into a full custom tone curve, you’ll want to switch from the Linear Tone Curve panel to the Custom Tone Curve panel. You’ll be adding points to the curve and then clicking and dragging the points to adjust your image.
If you want to switch between your custom tone curve and the linear curve, you can click on the bottom right of the panel and then set your points on the curve. As soon as you set your first point, you’ll watch the label switch from “Linear” to “Custom.”
The final step in creating your own custom tone curve is adjusting each of the color curves. Pull up the color curve you want to adjust, whether it’s red curves, blue curves, or green curves, and adjust points as you see fit. (Hint: It’s called color grading.)
A Case For Using Tone Curve Over Sliders
Are you still wondering why you should use the Tone Curve module over the Basic sliders? The reason is that the tools work differently. Yes, they both work. But the results they produce are quite different when you look closely.
When using the sliders, you’ll get a more targeted adjustment to whatever part of the image you’re changing. If your concern is highlights, you’ll see minimal changes to your shadows, for example.
With that said, you have more control over your contrast when you use Lightroom Tone Curve.
Why? Because you can create anchor points at the mid-tones, so you don’t see much change there – you’ll just adjust the highlights, lights, darks, and shadows. Midtones will be safe even if you’re taking the light and dark tones of your photos to extreme ends.
The short answer? Tone Curve gives you more control over the entire dynamic image than you could get with the Basic sliders.
While some of this instruction on using Tone Curve in Lightroom may still feel foreign to you, after some time practicing your Lightroom skills, you’ll see just how much power the Tone Curve feature can give you. Want to become one of the next great photographers? Begin developing your own editing style through the Lightroom Tone Curve tool and see where it takes you.