
If there’s a tool you need to know about in Photoshop, it’s the grid. This non-printing guide is an indispensable tool for your layout designs and the best part? You only have to learn how to make a grid once. Just save your creation to reuse it when necessary.
Looking to improve your photography? Just enter any questions you have about improving your photography below and hit send and get answers & feedback instantly - for FREE! Submit Questions5 Basic Steps to Make a Grid in Photoshop
Making a grid in Photoshop is a relatively simple process. Follow these five steps to create this useful device.
Step 1: Create a New Document
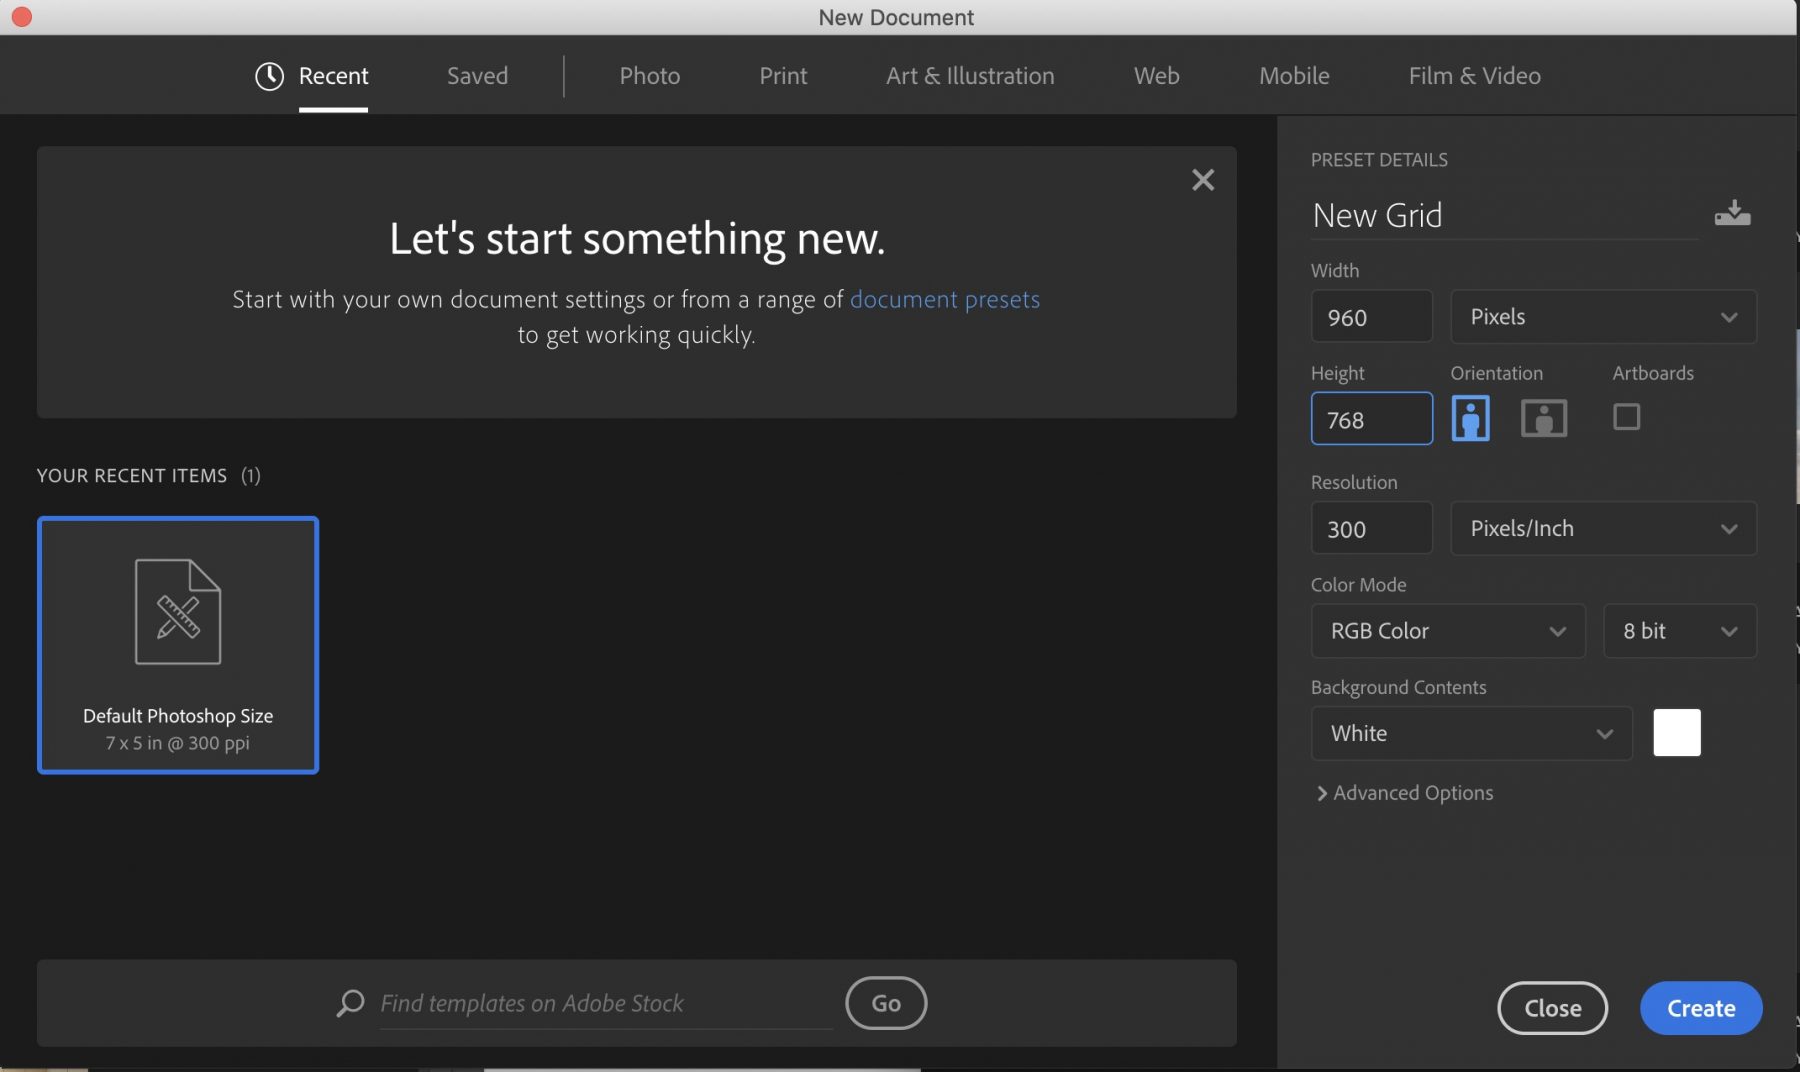
The first thing you have to do is open Photoshop and create a document. You’ll need to set the pixels at this point. If you’re designing for 1024×768 monitor resolution, we recommend setting your document to 960×768 pixels.
Step 2: Create a New Grid Layout
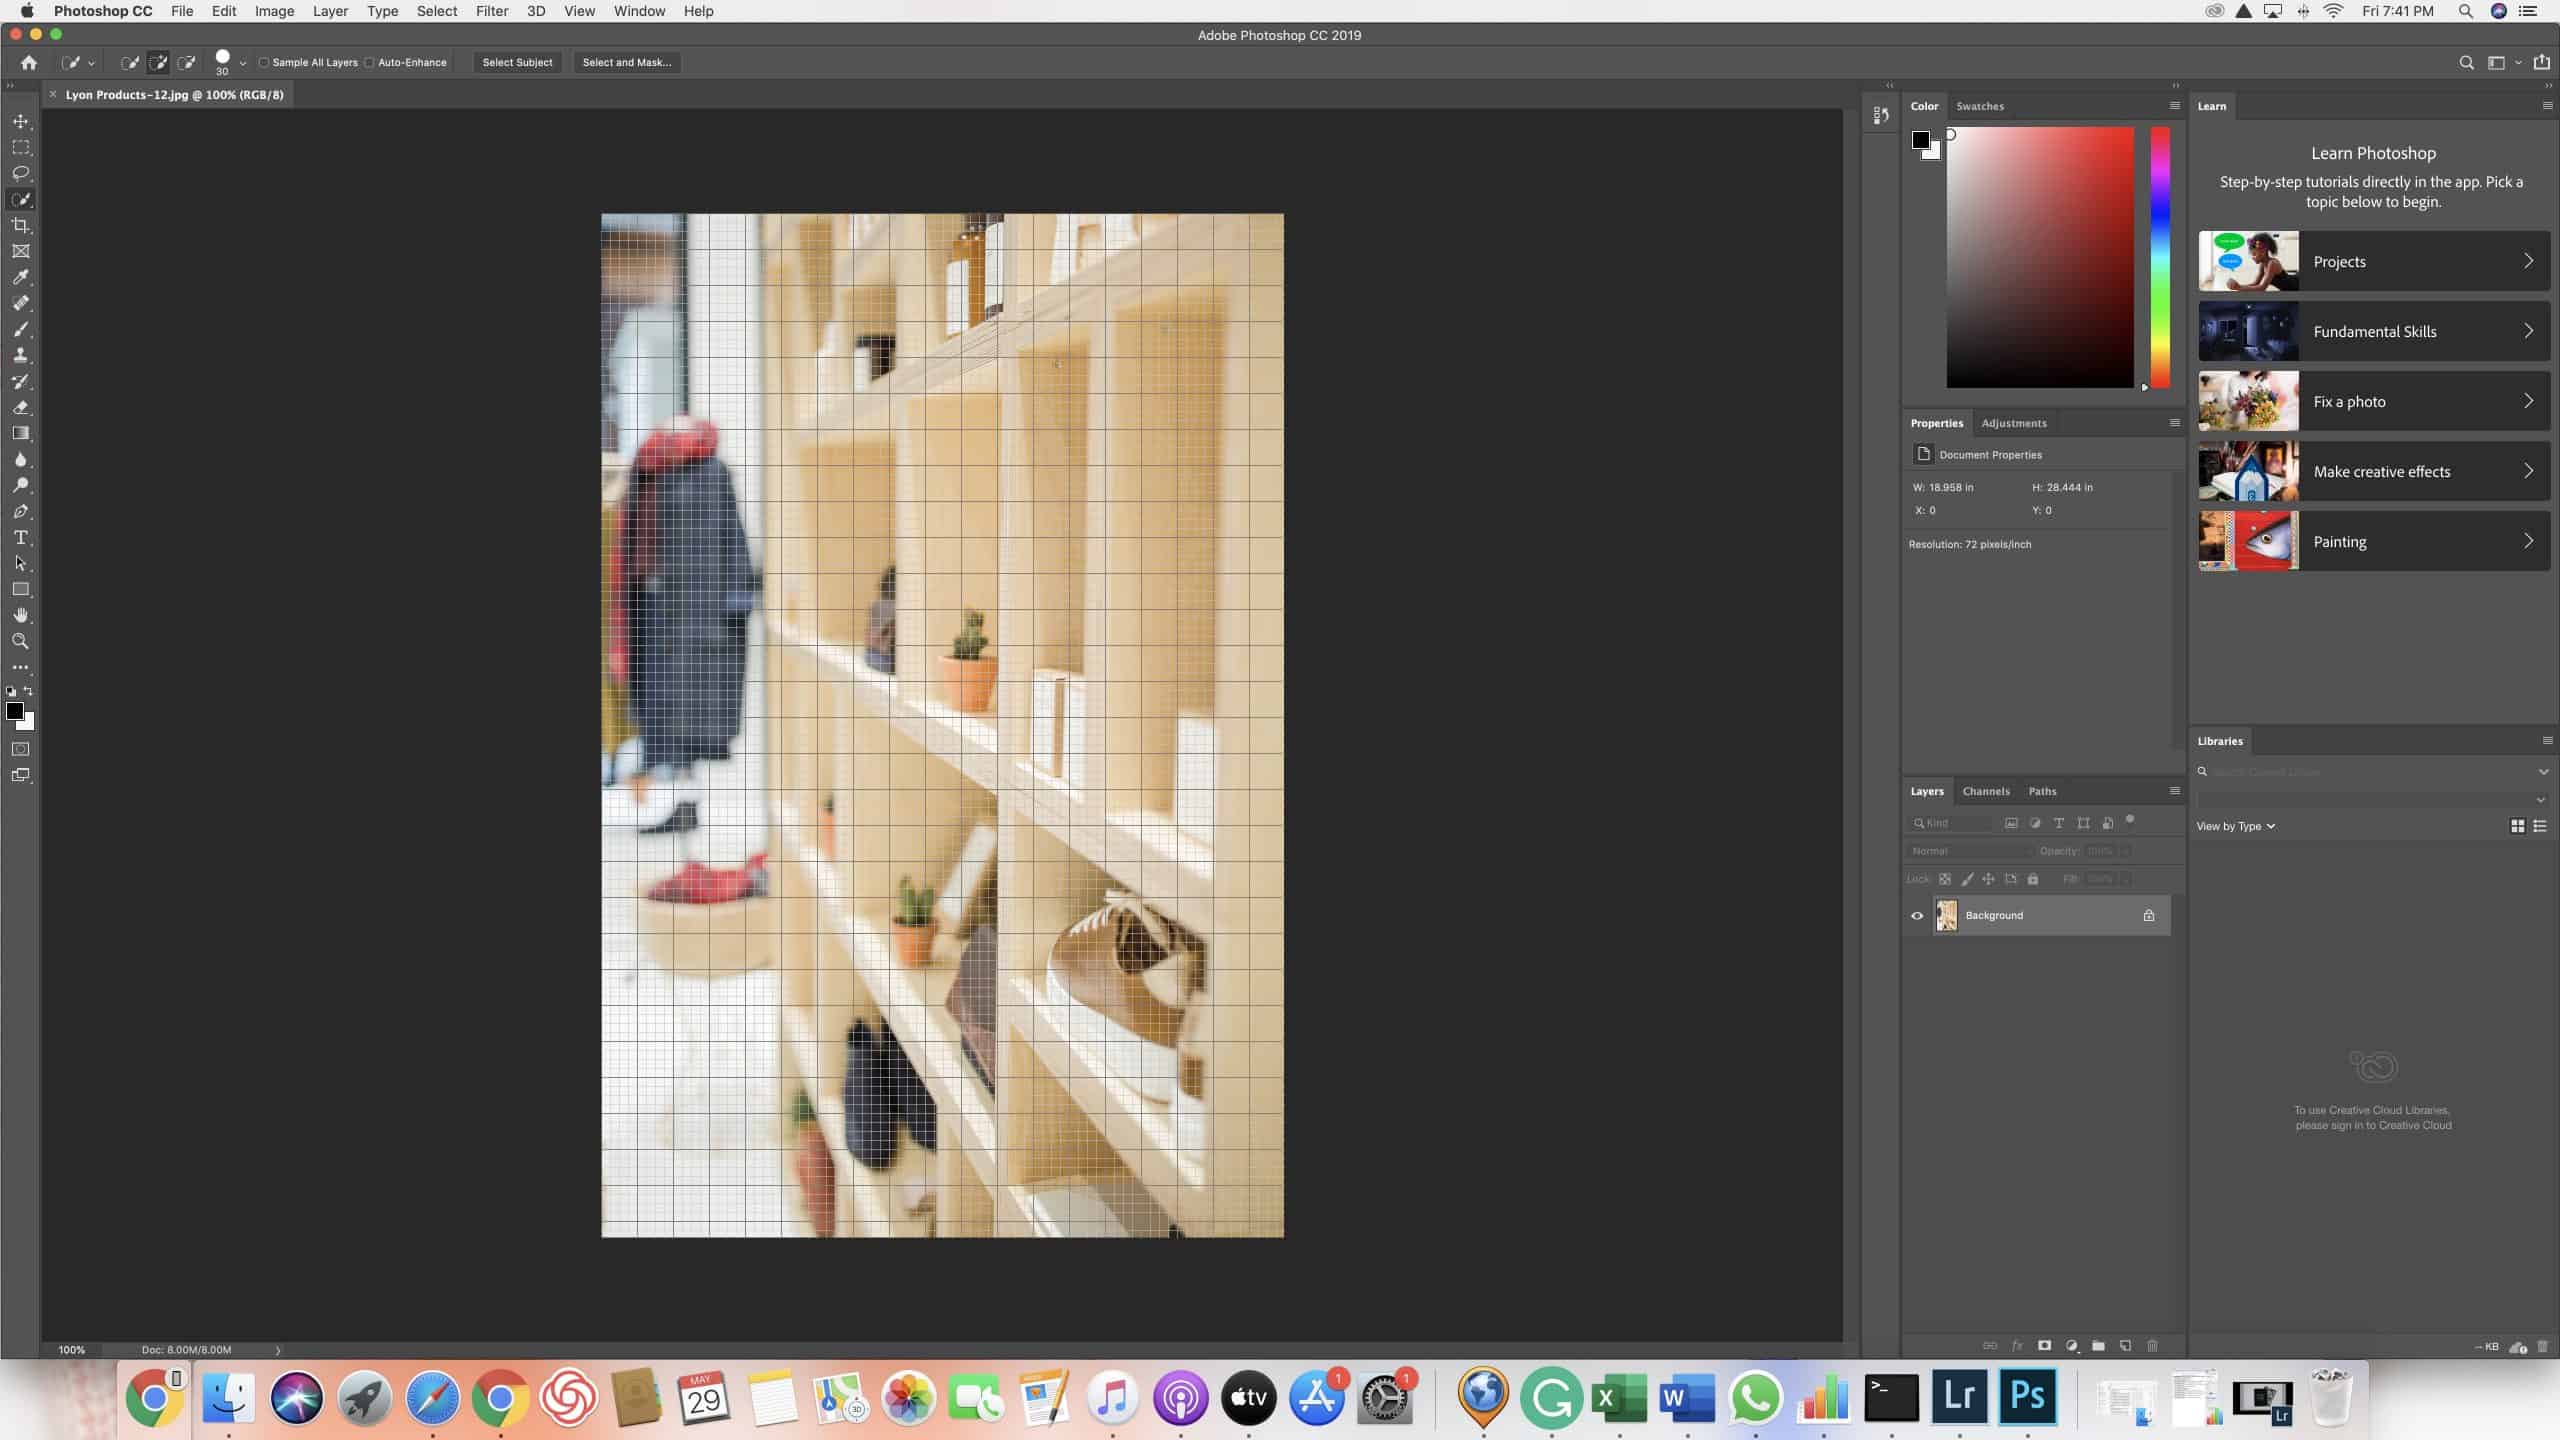
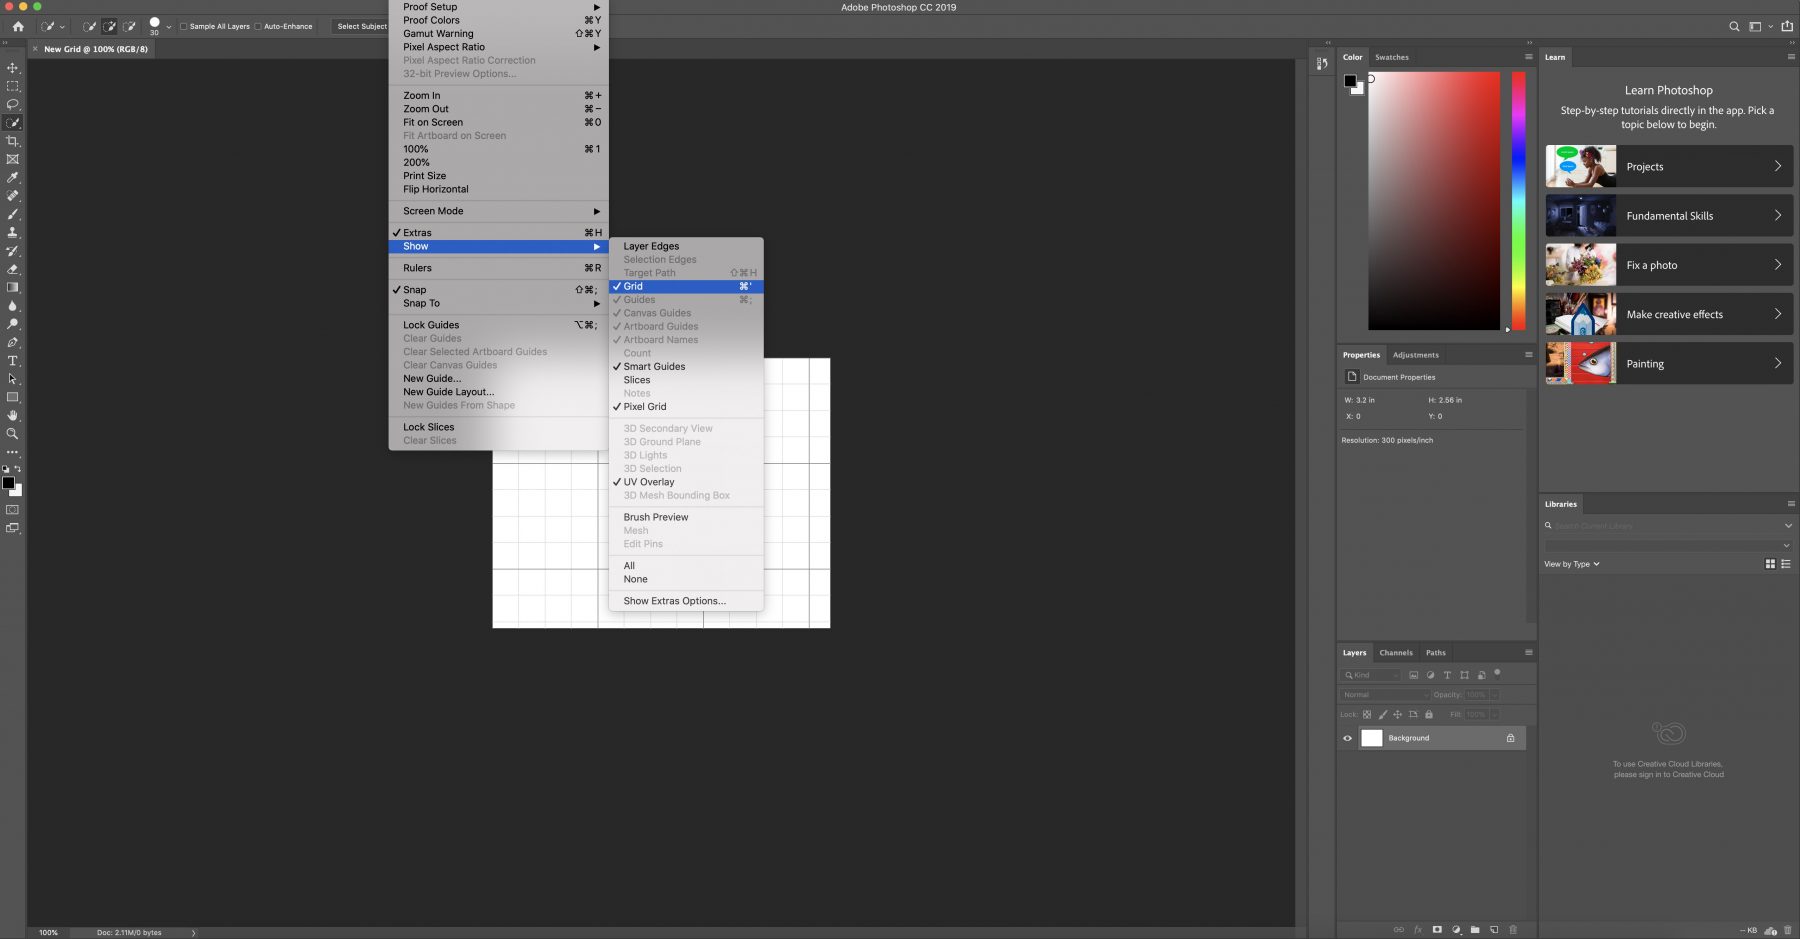
Now it’s time to create a new Photoshop grid. Click on “View,” then “Show,” and finally on “Grid.” Once you’ve arrived at this window, you can set preferences guides for your grid, which gives you more control over what it does. You can change things like the grid color, the distance between grid lines, and the number of subdivisions between the main lines.
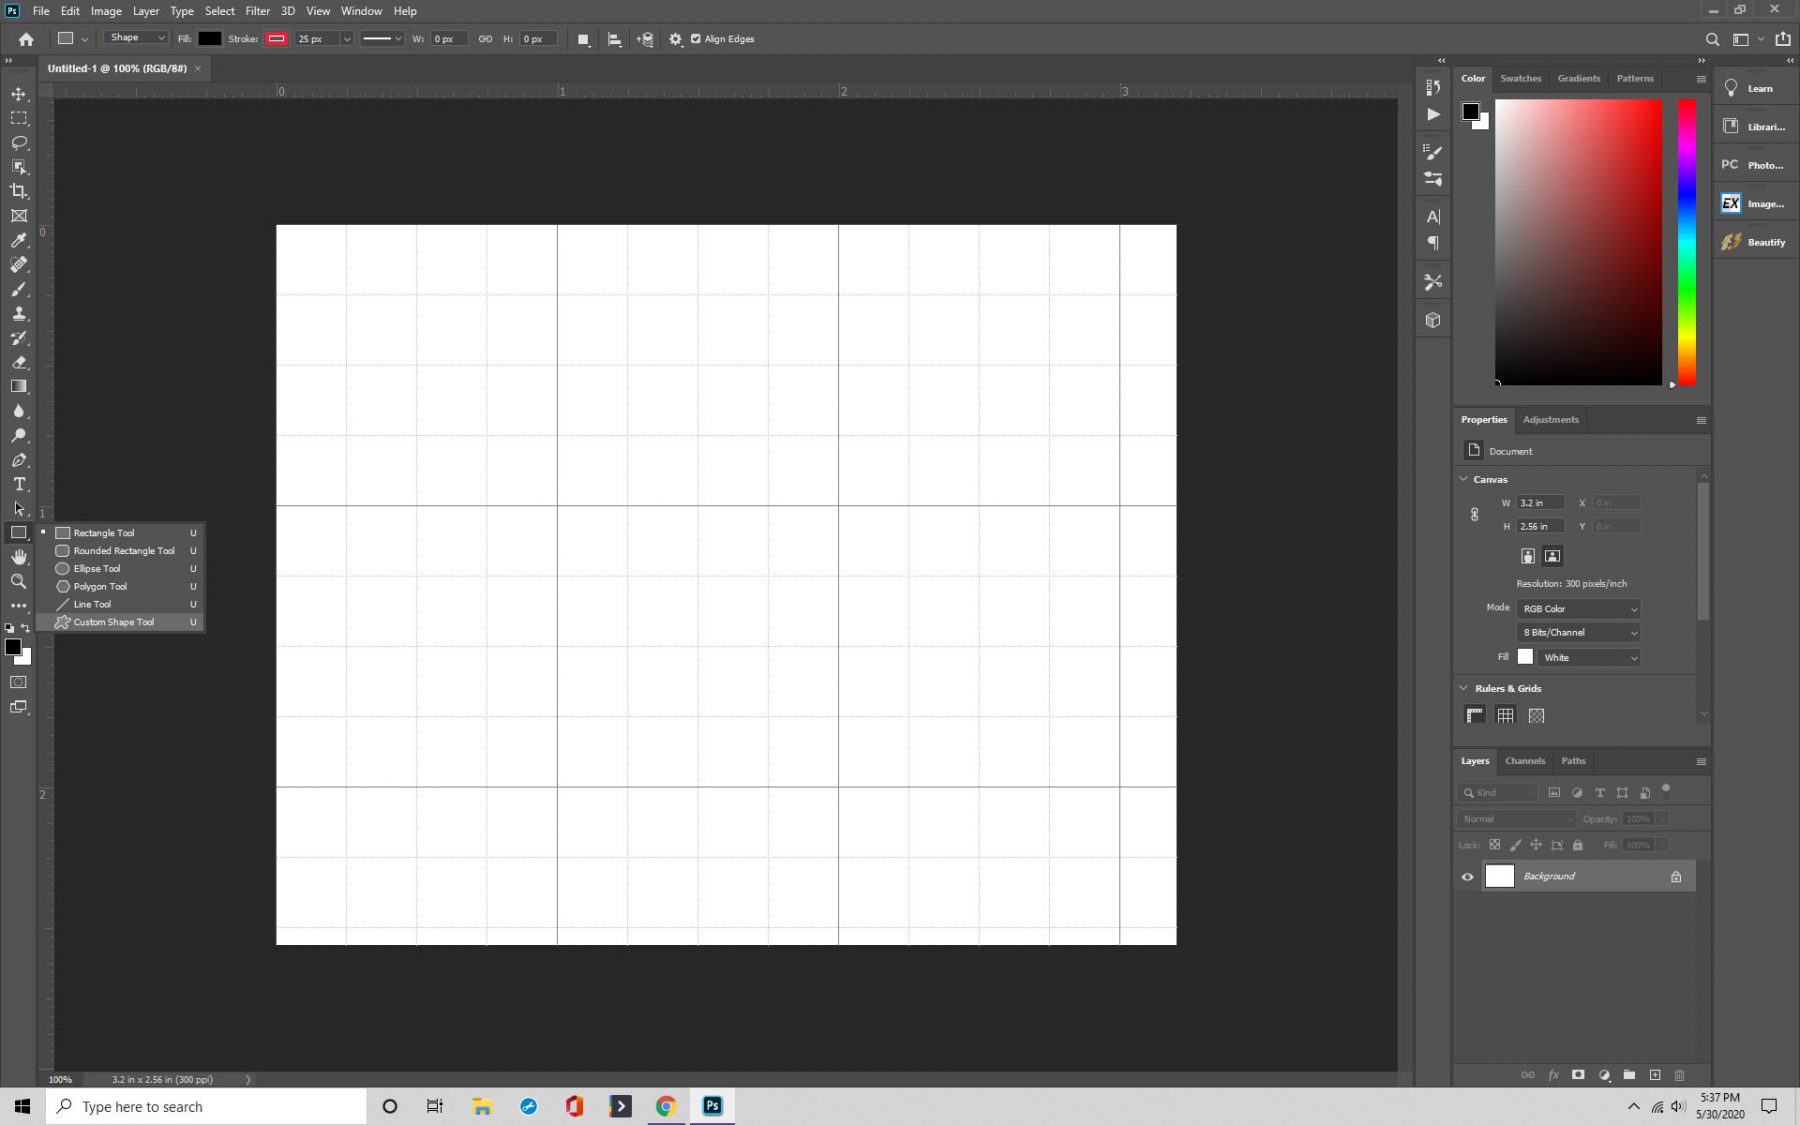
Step 3: Create Shapes
After you’ve set the preferences for your Photoshop grid, it’s time for the fun stuff: using it to create shapes. Head to “Custom Shape Tools” and select the one you want to use. Drag it to the square you want and release the shape.
It will snap to the size of the square. Repeat as many times as necessary in that row.
Once you’re satisfied with how your row looks, you can duplicate it or move it to a new section entirely.
To do this, navigate to “Layers Palette,” which is where you control how your rows repeat. Use this tool until you achieve the look you want.
Step 4: Link
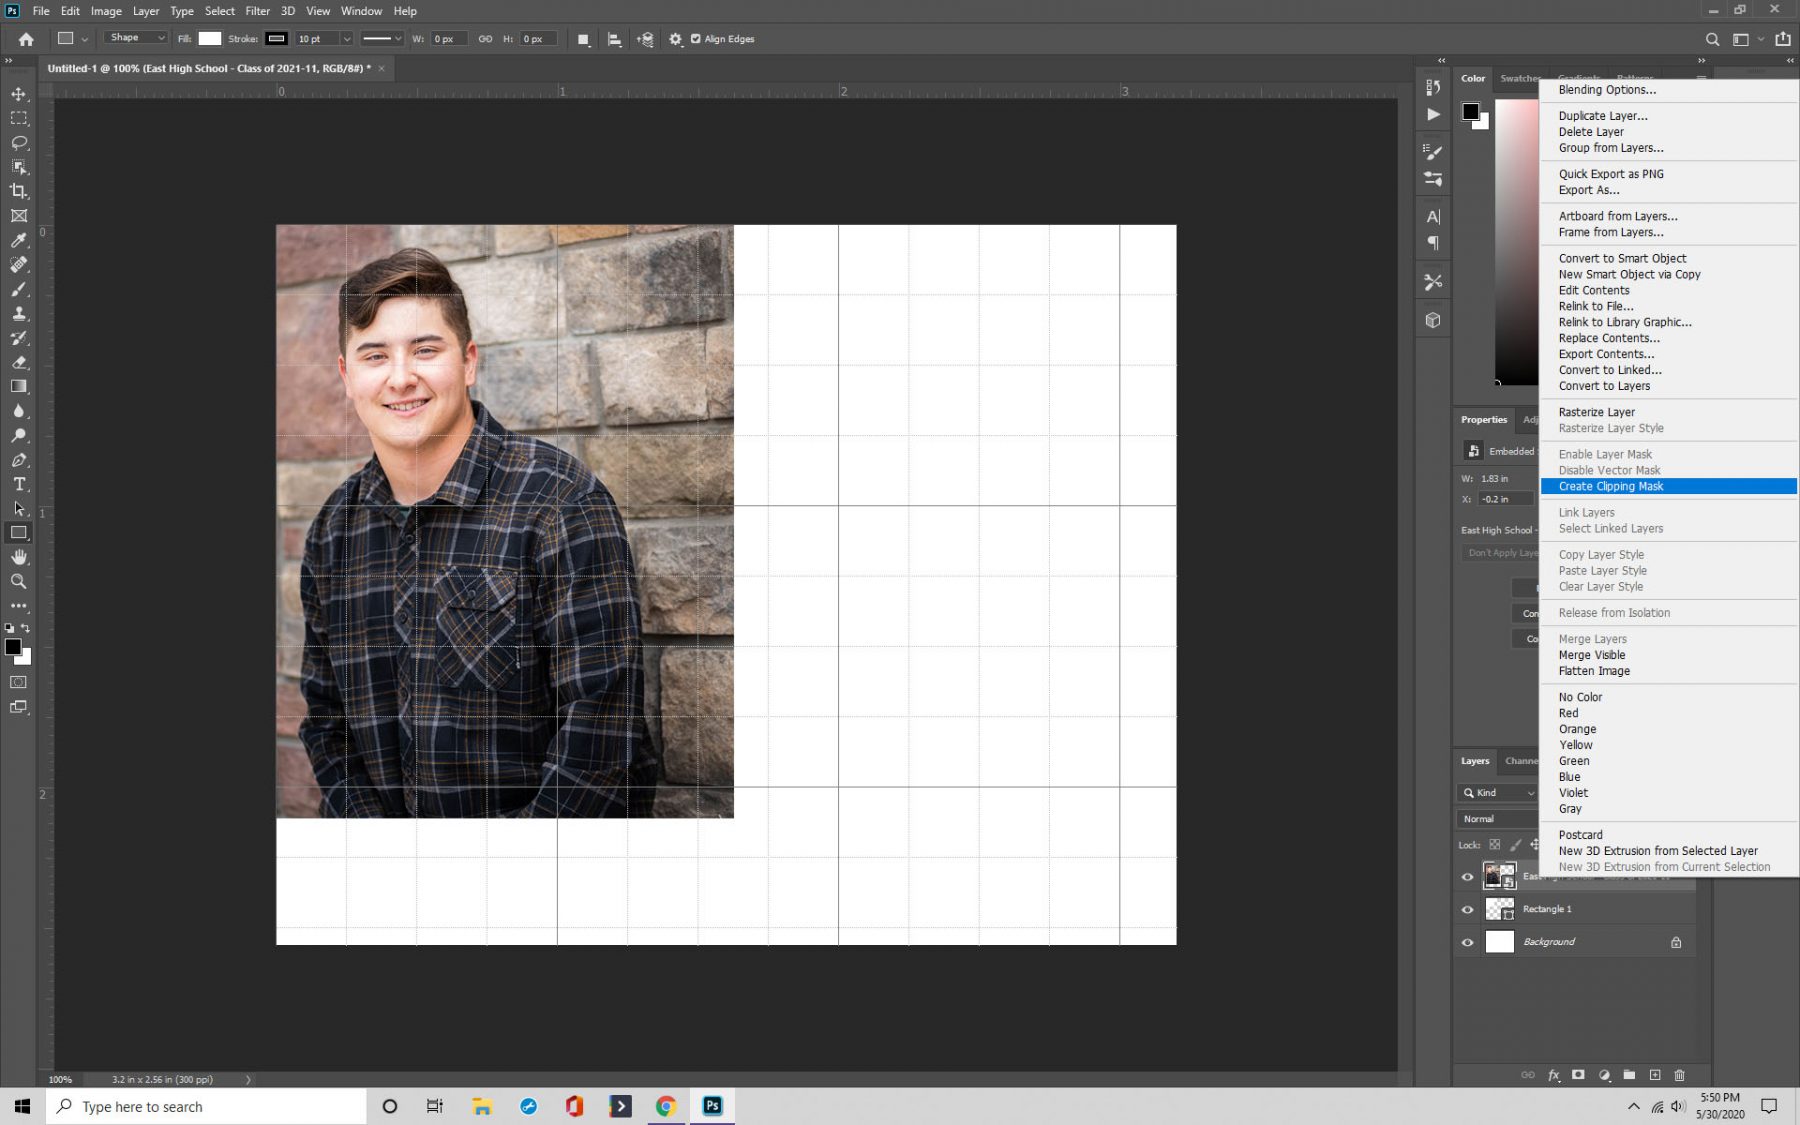
Another way to use the grid is by linking an image to each shape you create. Start by choosing the layer where you want to place the image and then click “File” and “Place.”
At this point, you select the image and then navigate to “Layer.” Click “Create Clipping Mask,” and your image will appear in the grid you’ve indicated.
Step 5: Save
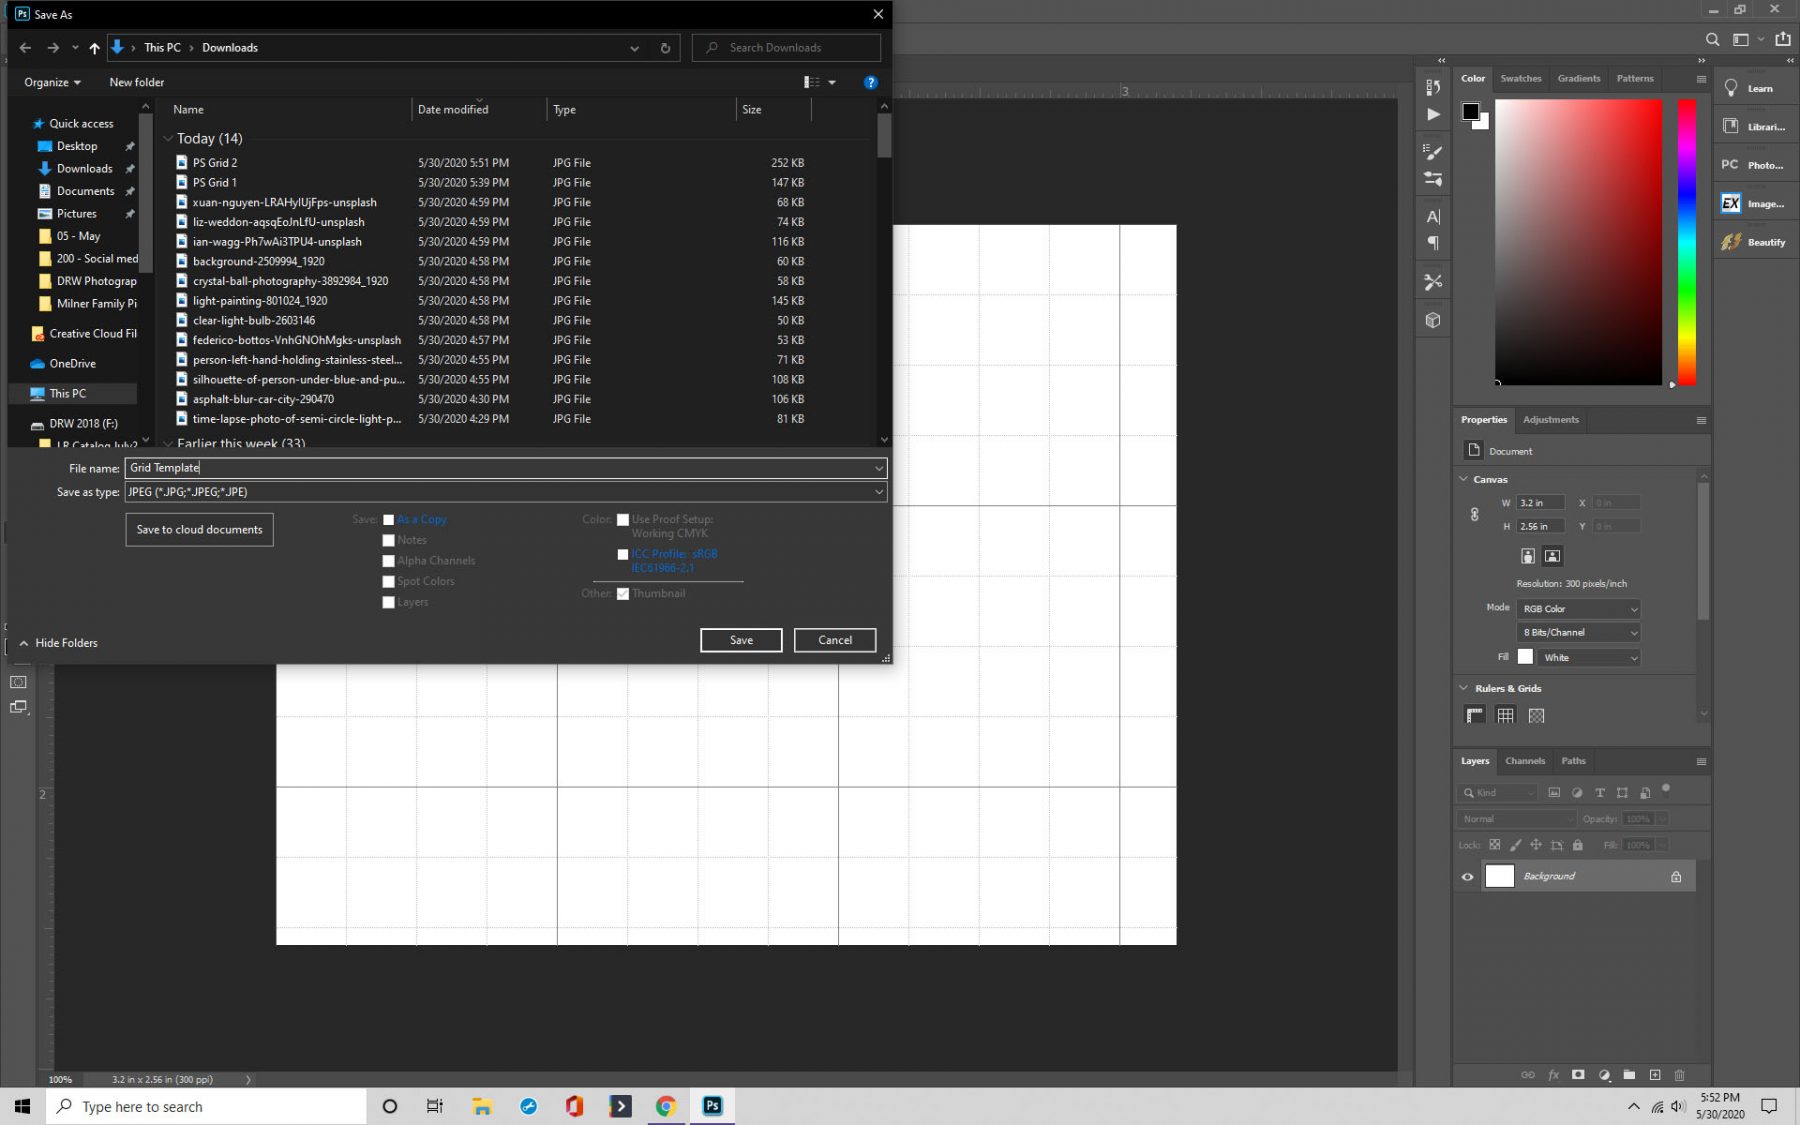
Although making a Photoshop grid is easy, we recommend saving grids for easy access to them in the future. You can also share them with others.
Press Cmd/Ctrl+S, and a save box will appear. You can now name your grid and assign it a file type. The most common are .PSD and .TIF.
Making Glowing Lines on a Grid in Photoshop Like in Tron
Now let’s go over the process for making glowing lines on a grid.
Step 1: Create a New Document
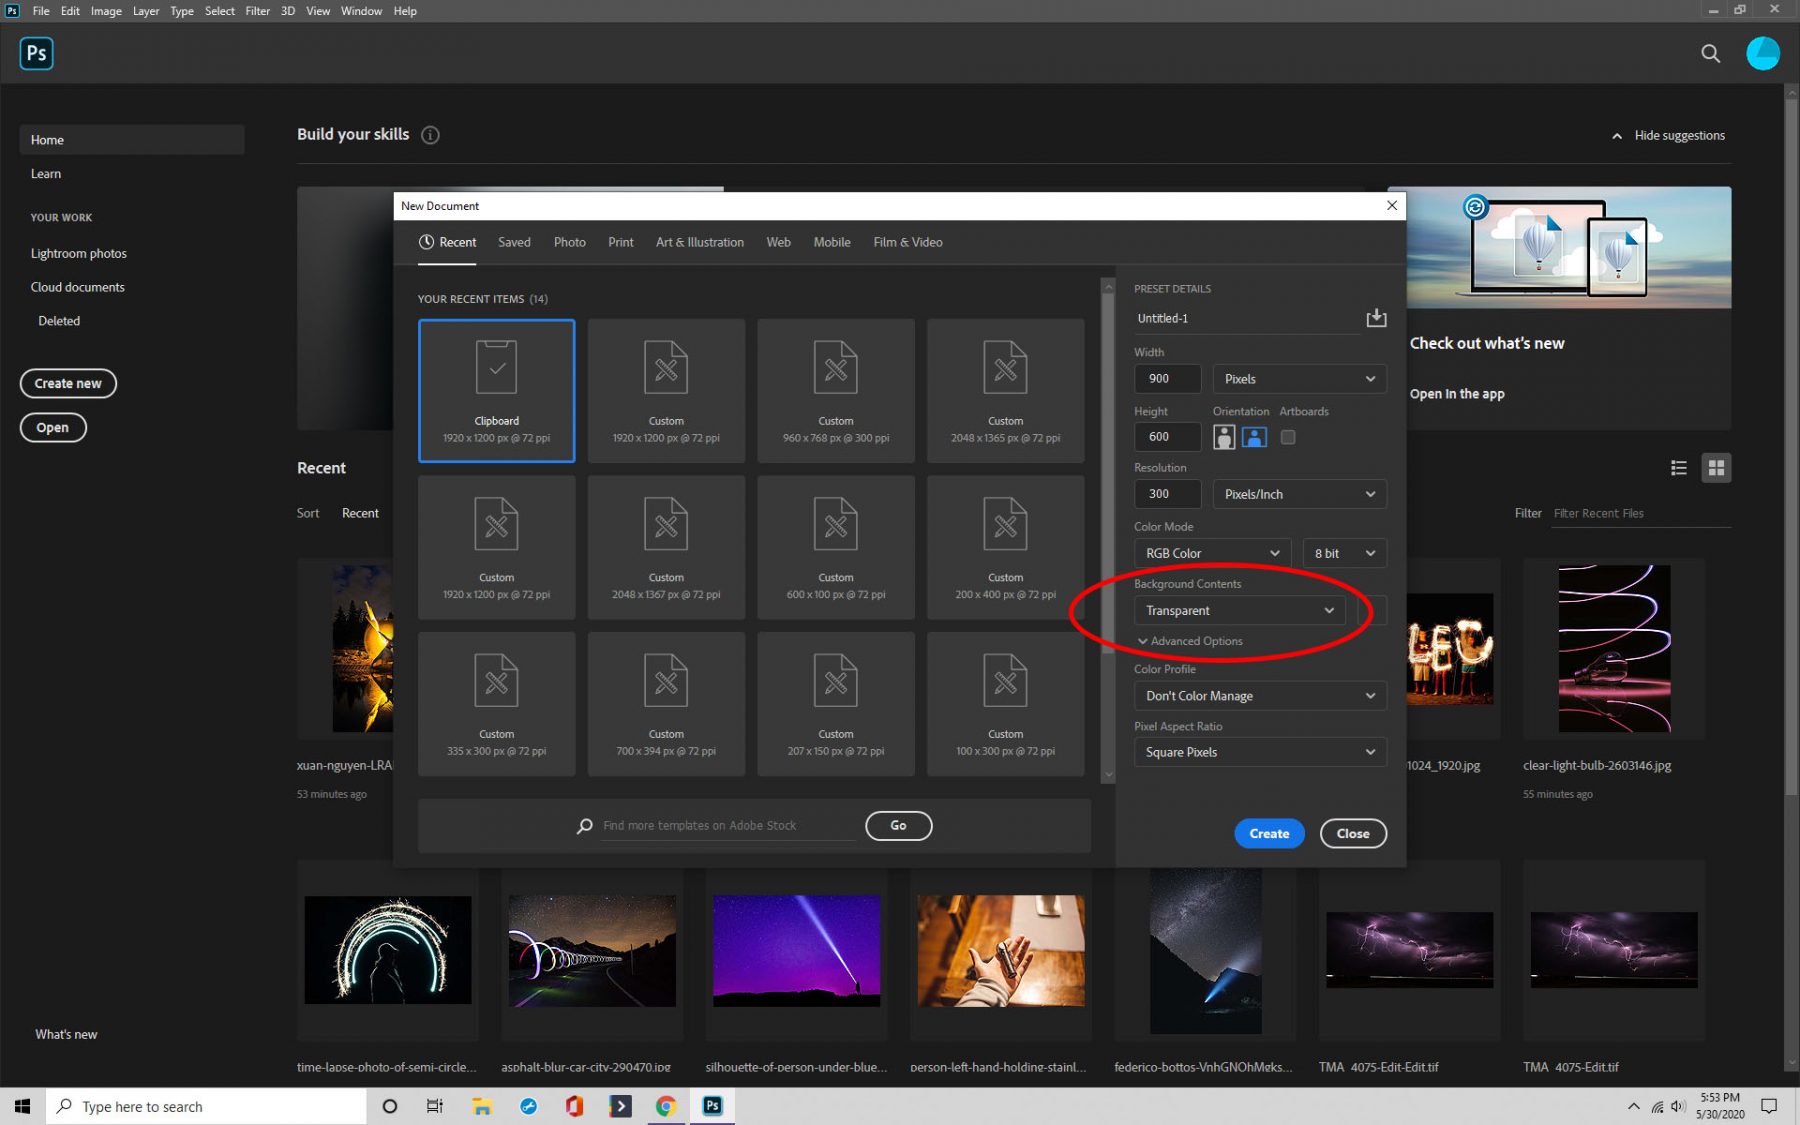
Like before, you start by opening Photoshop and creating a document with the specifications that you want.
As you’re doing so, the fundamental step is to make sure that you select “Transparent” from the picklist under “Background Contents.” Otherwise, you won’t see anything behind your grid.
Step 2: Settings
Once you’ve got your document set up in Photoshop, it’s time to choose your color and change the settings you need to adjust to achieve the glowing lines.
Navigate to “Edit,” and then click on “Stroke.” In this box, the width should be one, and you should set “Location” to inside.
Step 3: Save
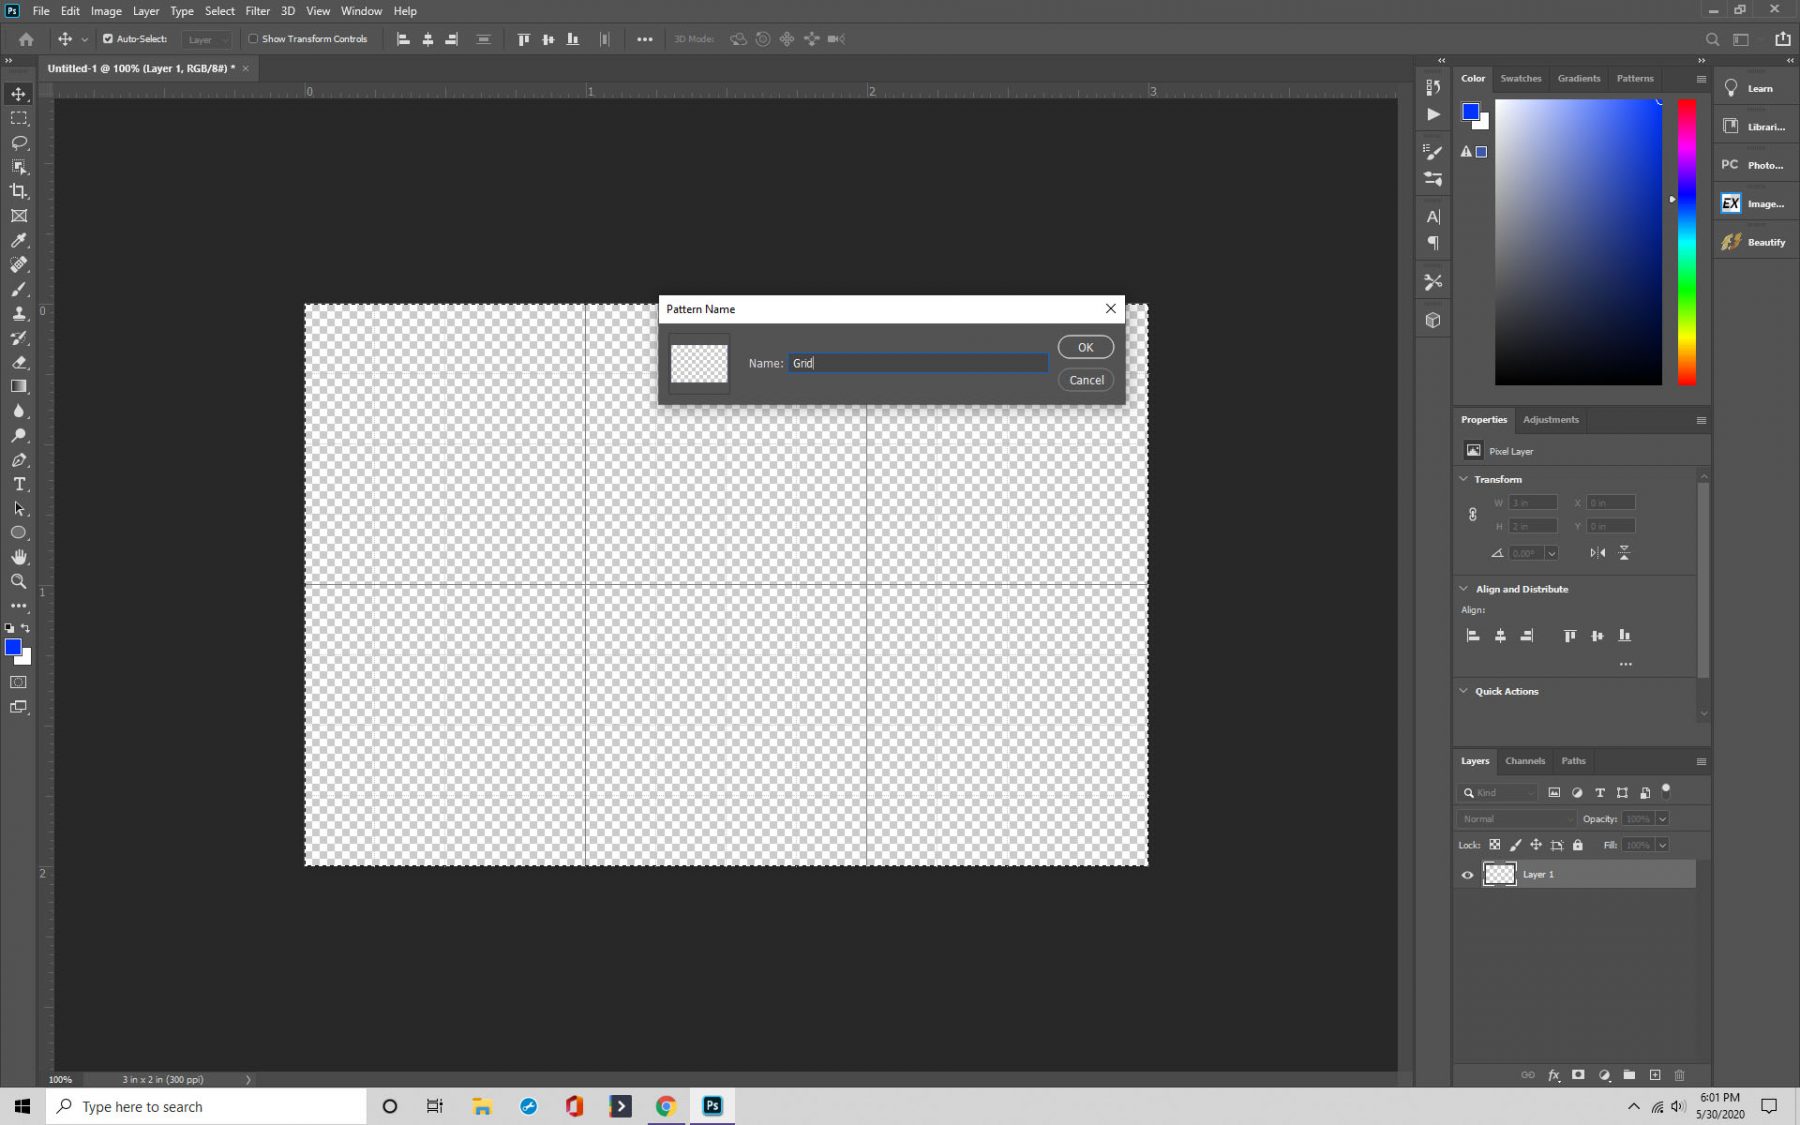
If you want to be able to come back to the pattern, save it by going to “Edit” and then clicking on “Define Pattern.” Give it a name and hit save.
Step 4: Use Your Custom Pattern
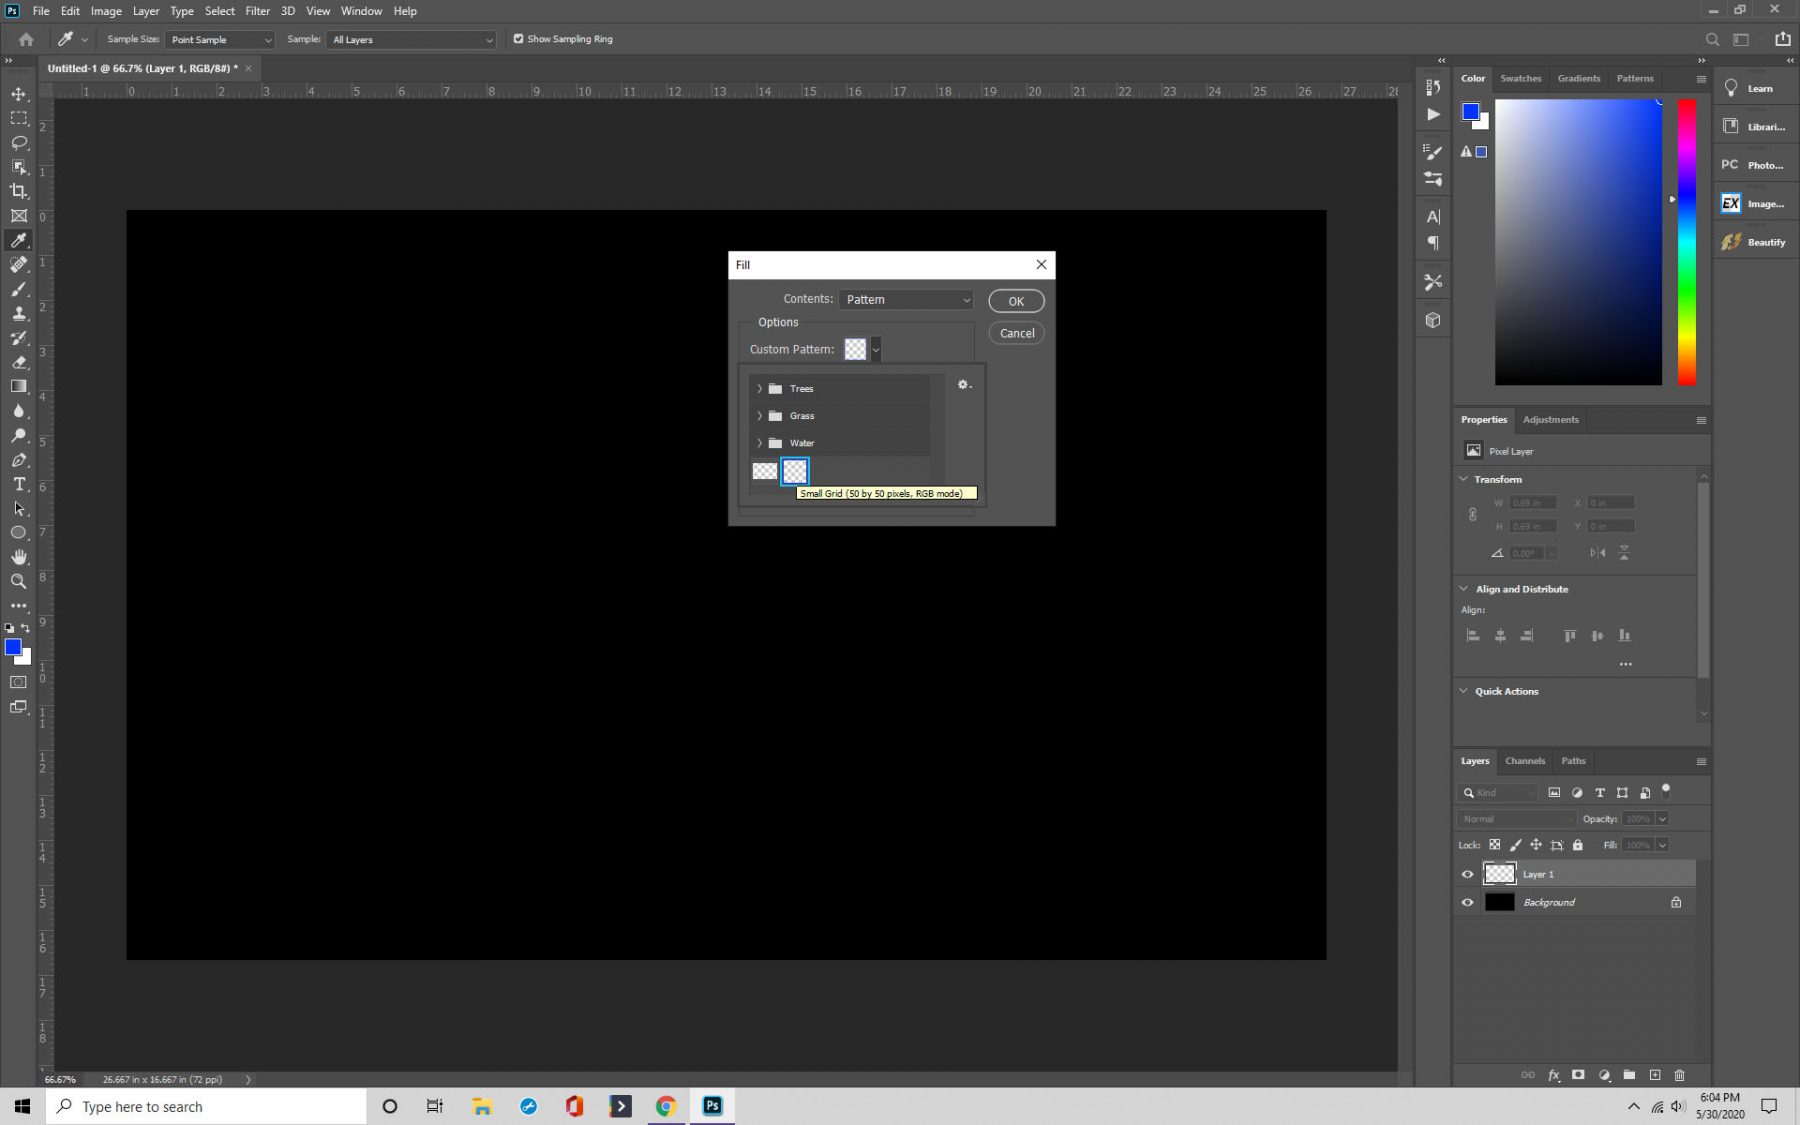
Now it’s time to talk about using the pattern you’ve created. To use your custom pattern, make the document black, and then create a new blank layer.
Add the pattern by going to “Edit” and clicking on “Fill.” You’ll be able to find your pattern under the contents section.
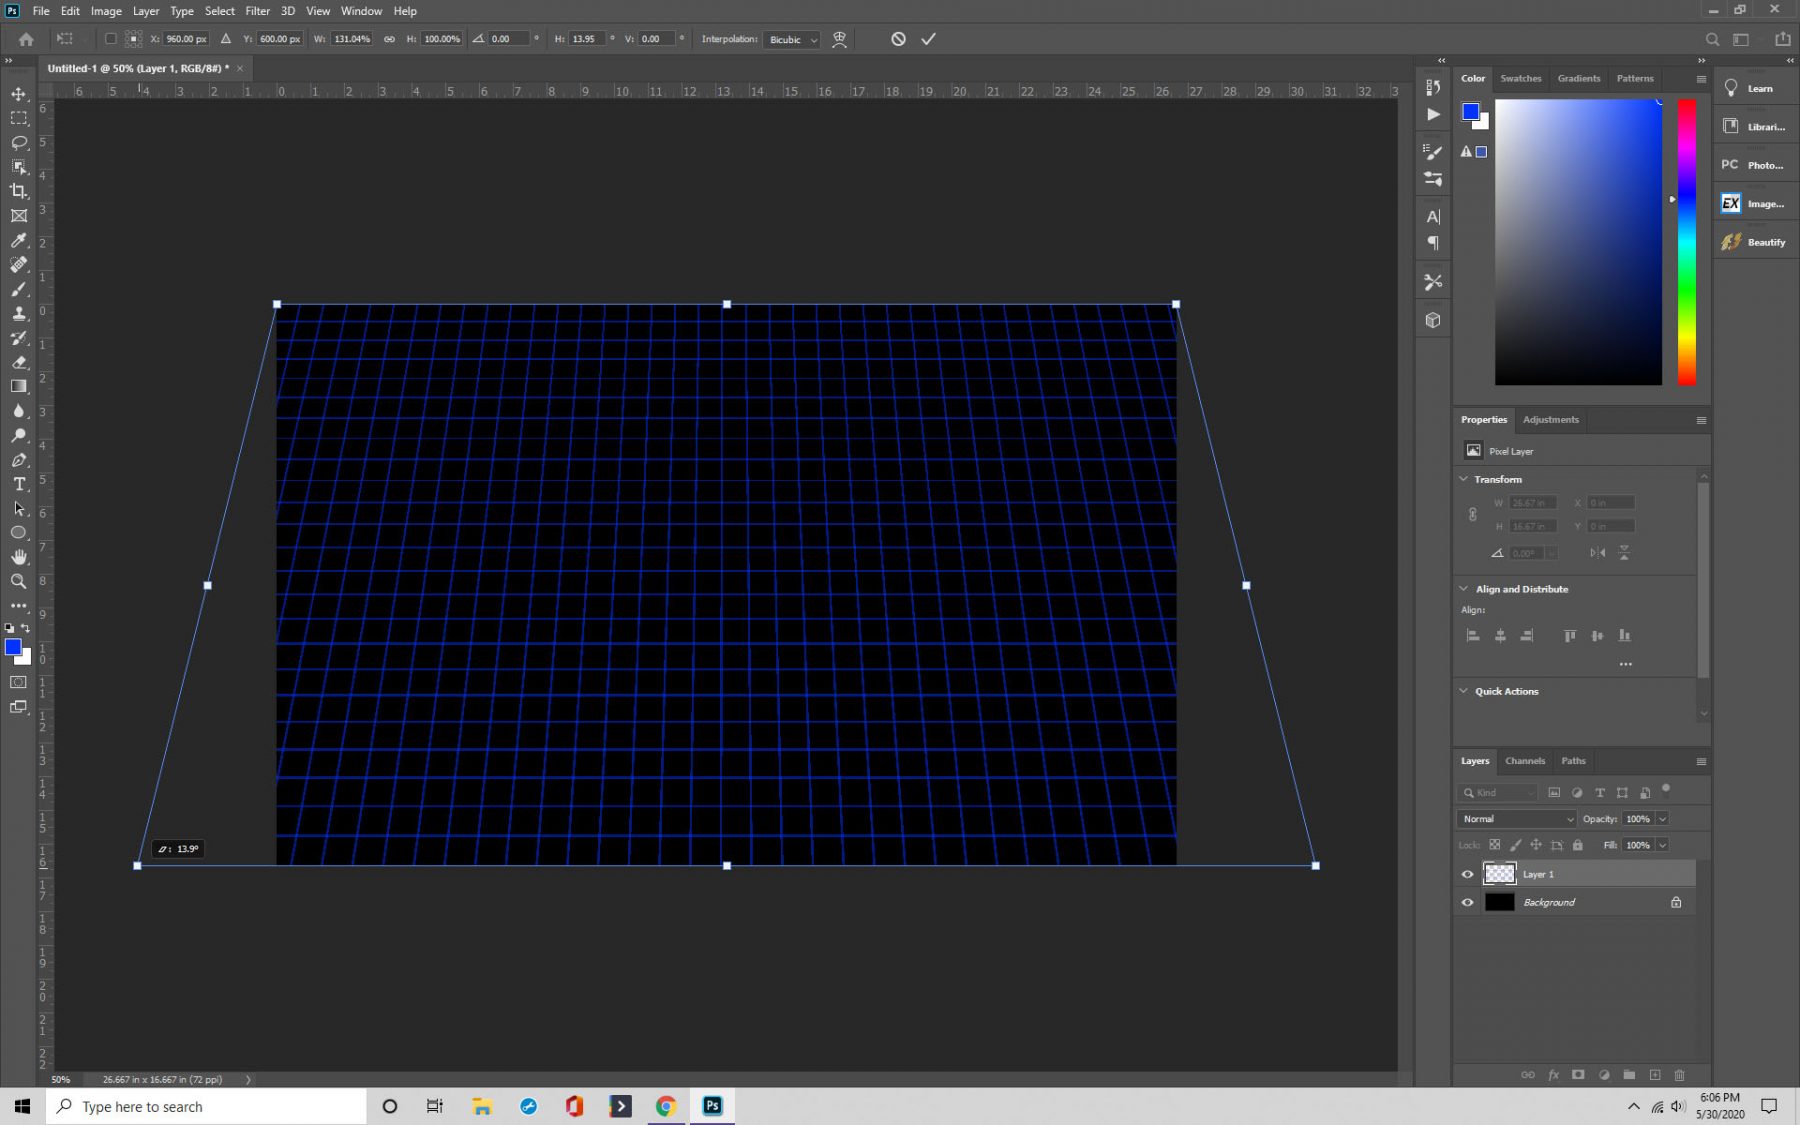
Step 5: Use the Free Transform Tool
The next step is to use the free transform tool, and you do so by pressing Ctrl/Cmd+T, which makes it appear.
Right-click on your mouse, choose “Perspective” from the box that appears, and then you can drag the box from the image.
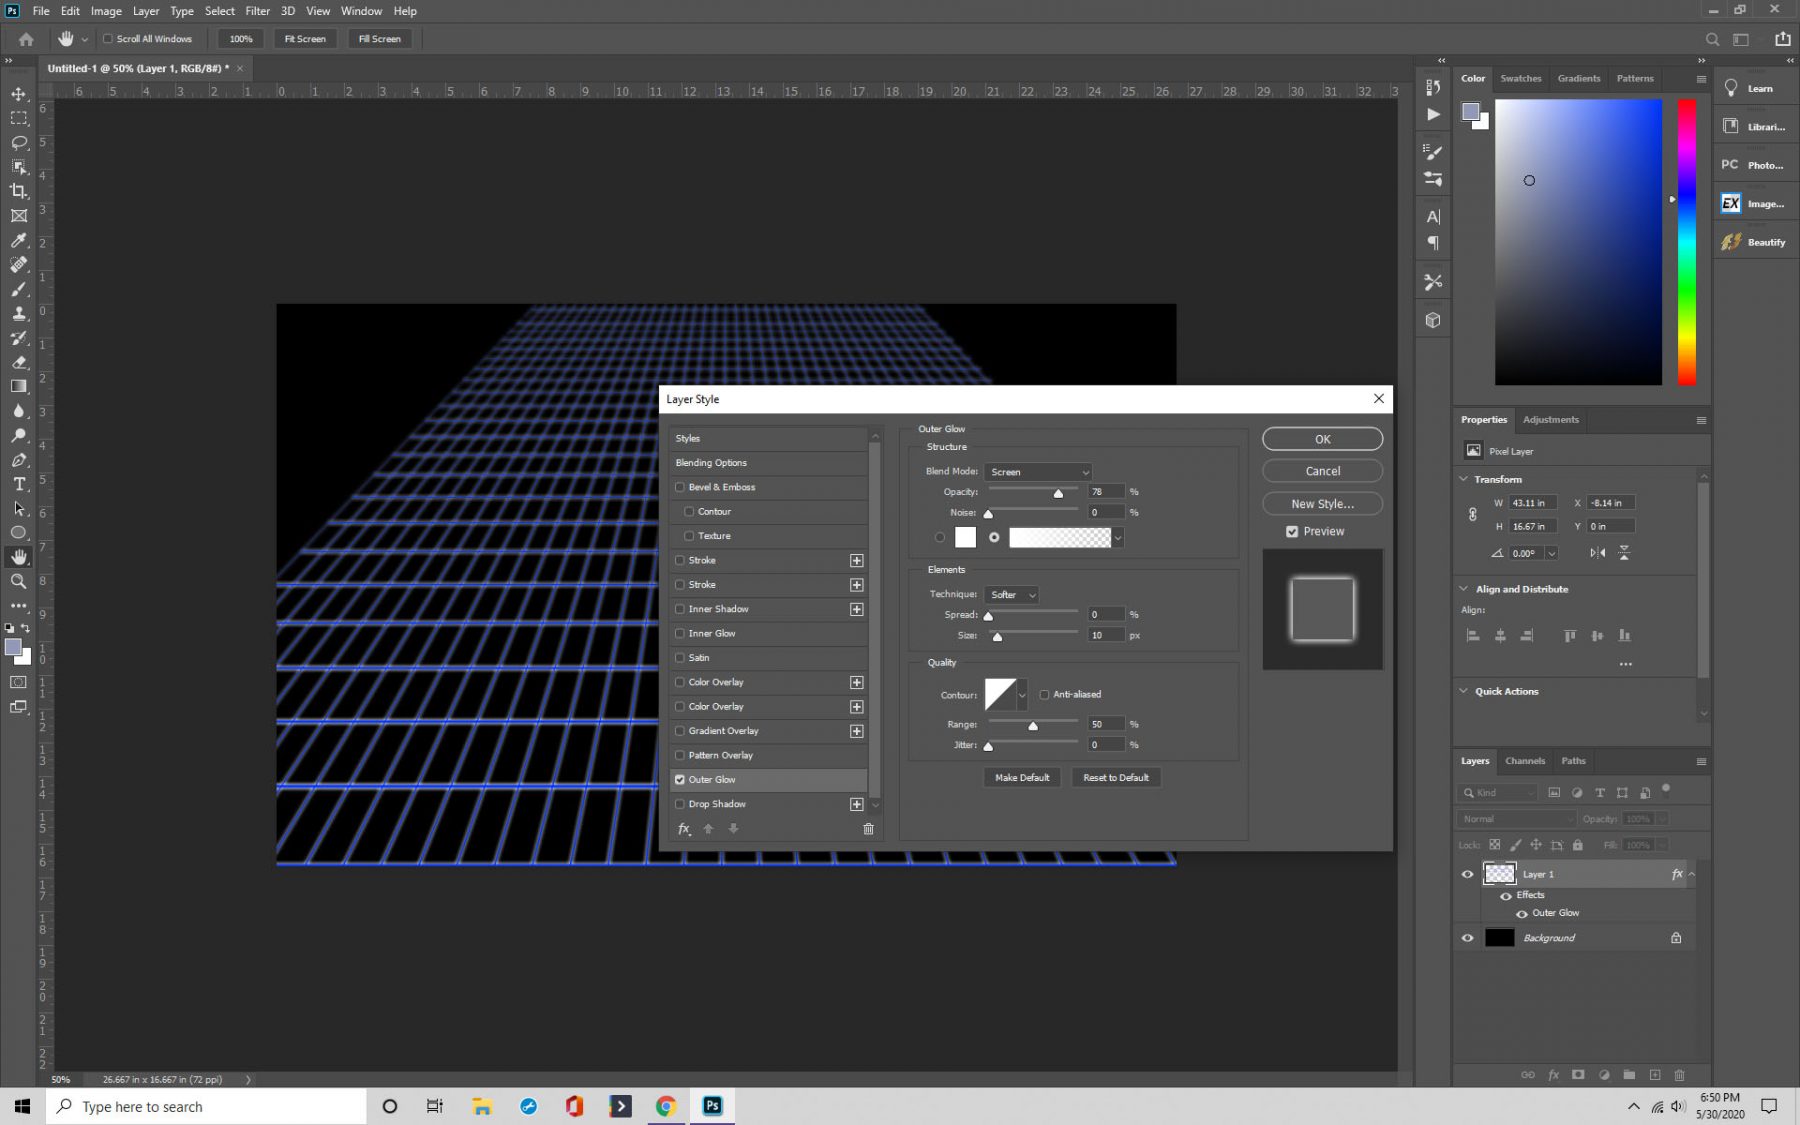
Step 6: Make it Glow
The final step is to navigate to “Layer Styles” and select “Outer Glow.” Congratulations—you’ve achieved the desired Tron effect.
Adding Guides in Photoshop
Another useful feature we want to share with you is the guides and rulers in Photoshop.
They’re a critical tool for document layout, making things like placing objects and drawing shapes much more straightforward. Here’s how to use them.
Step 1: Adding the Ruler
Our first step is adding the ruler in Photoshop. Open the program and create a new document or use an existing one.
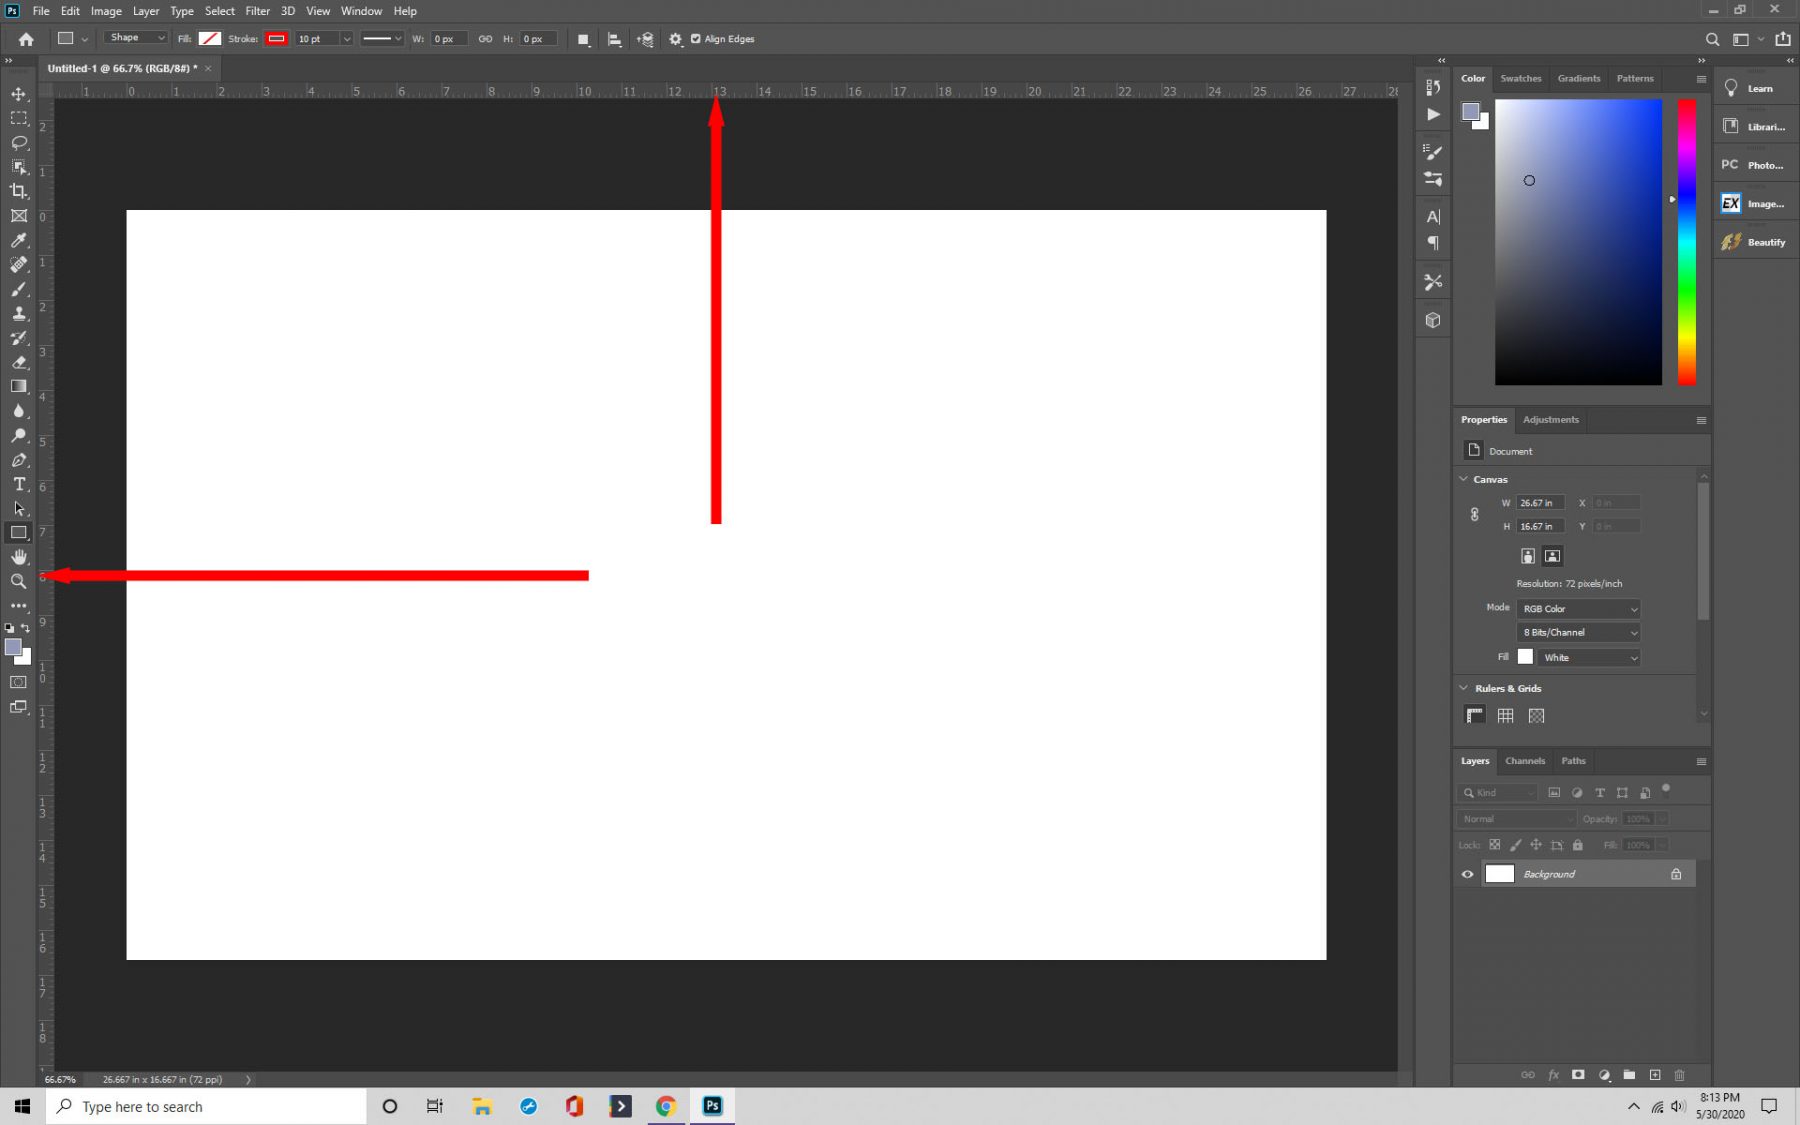
You’ll then want to navigate to “View” and click on “Rulers.” Two rulers should have now appeared on your screen.
You can also change what measurement the rule uses depending on your preference. Hover your cursor over the ruler at the top or side and then right click your mouse button. Choose the measurement you prefer, such as pixels, picas, inches, millimeters, or more.
Step 2: Guides
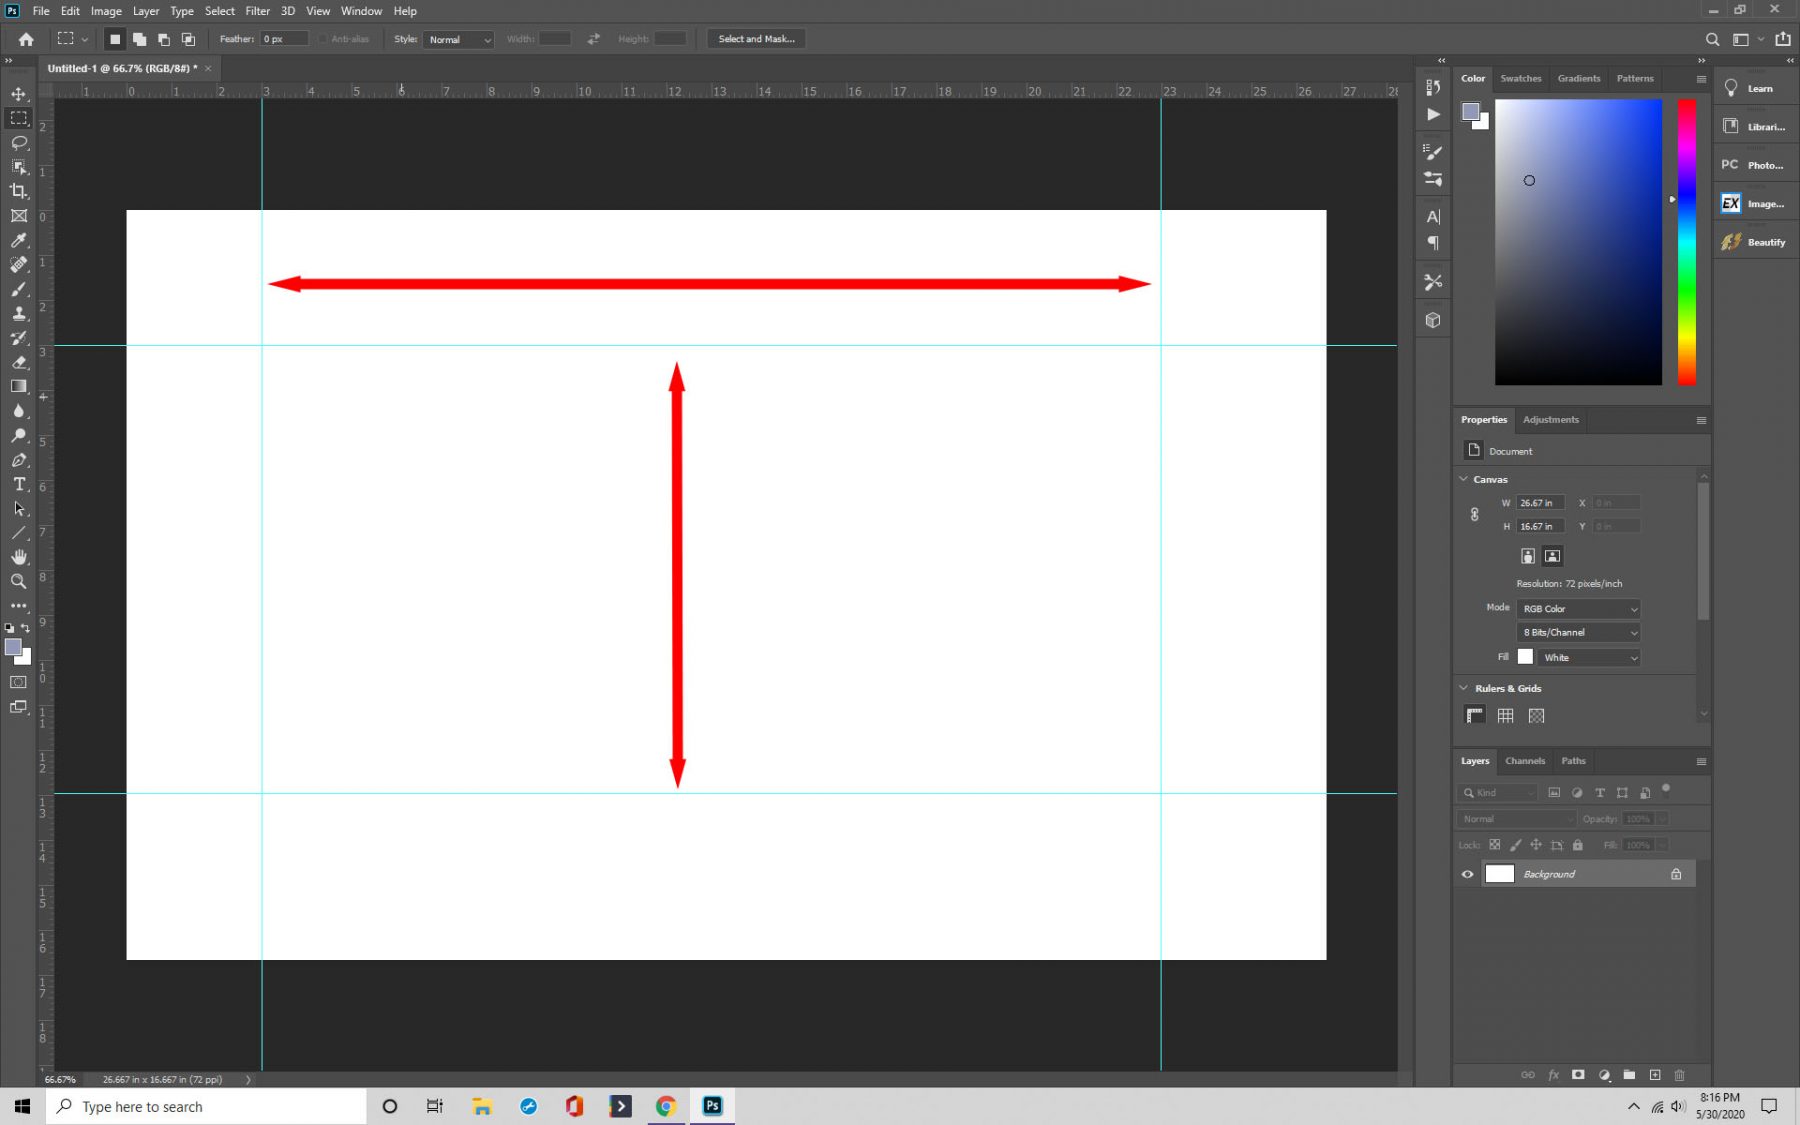
Now you’re ready to use the rulers as a guide, which is super easy to do. You click on the ruler and drag it where you need it. Just remember that before you can move the rulers, you need to have the moving tool selected.
You can also keep them in place. Lock the rulers in position by navigating to “View” and clicking on “Lock Guides.”
Step 3: Snap
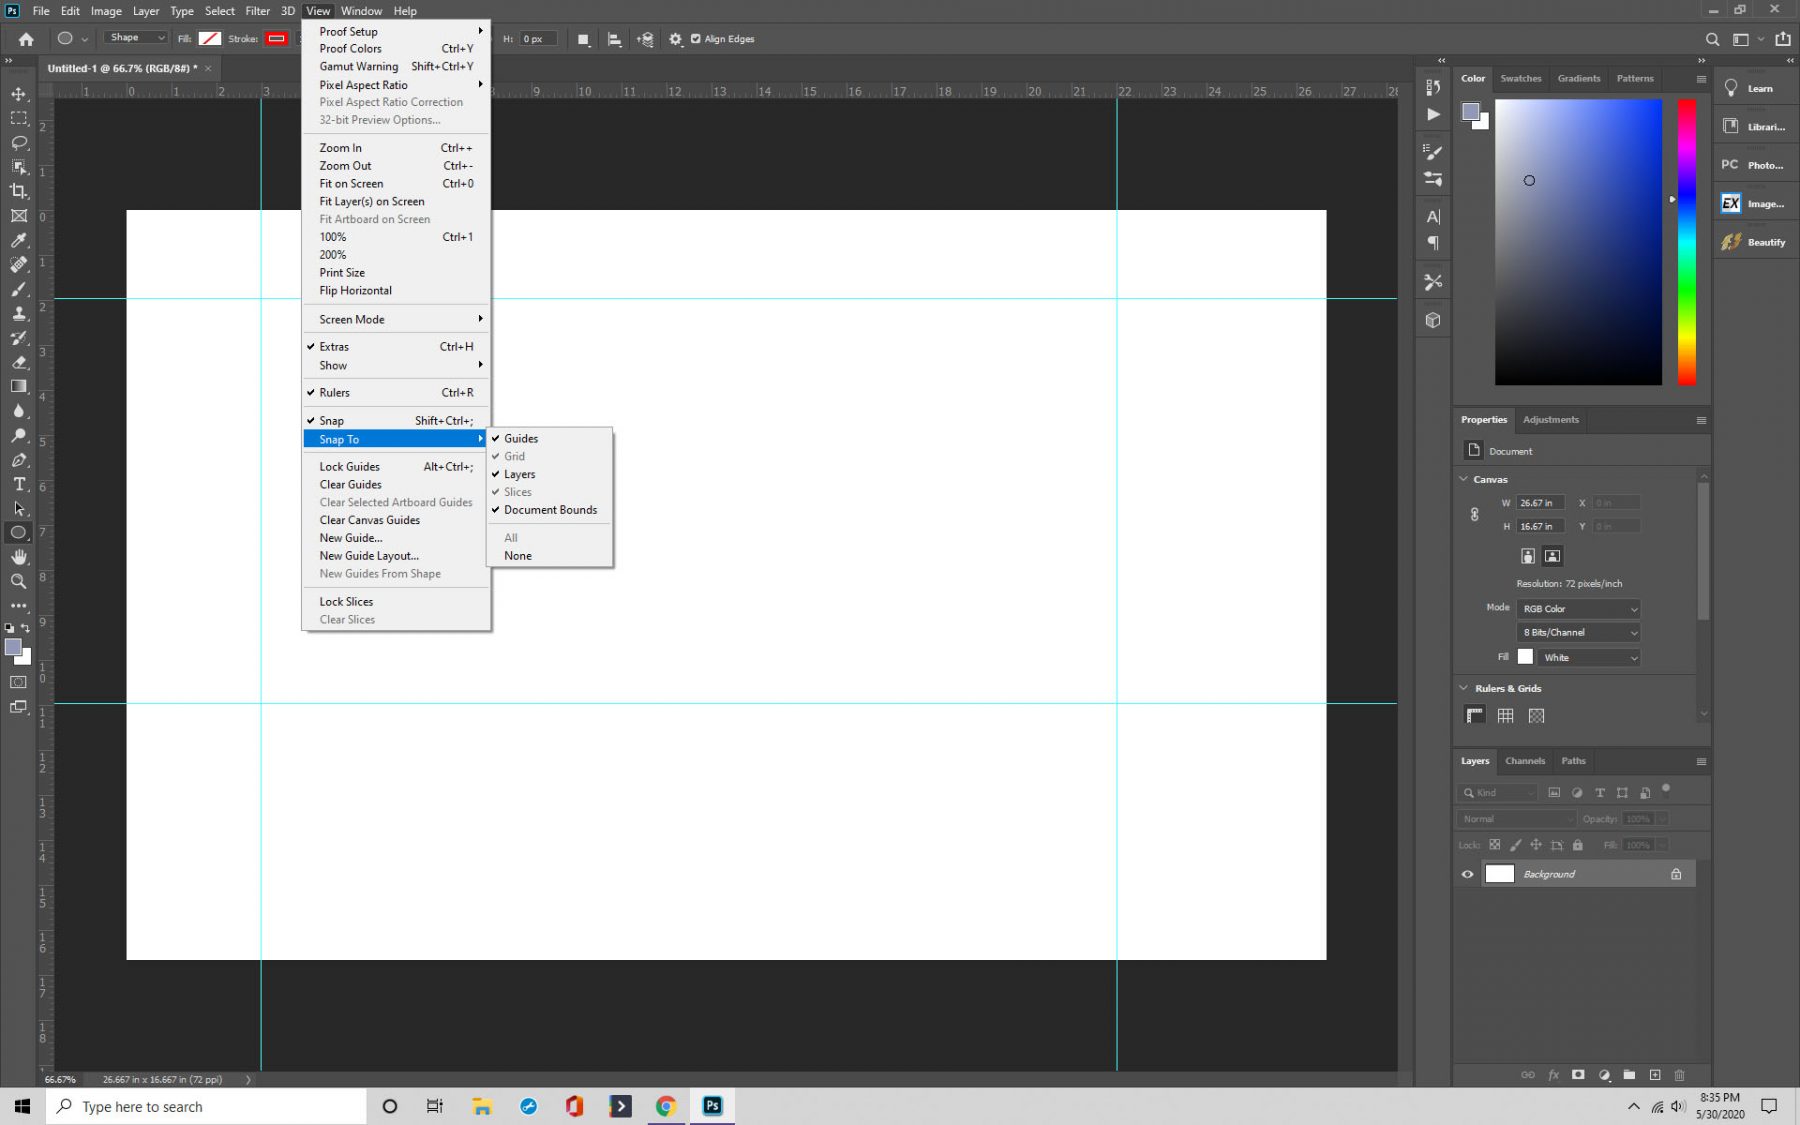
Snapping is another useful thing you can do with your guides in Photoshop. Snapping means that when you place an object on your grid, it will automatically “snap” in position. It’s helpful for aligning layers, text, and pretty much anything you want.
To activate it, click on View>Snap or View>Snap To, depending on the version of Photoshop or Photoshop CC you’re using.
Make sure that you check the box corresponding to “Guides and Grid,” as well as the box on the View menu. Now when you click on the grid, objects you put there will snap into place.
Step 4: Removing and Hiding Guides
Finally, you can remove or hide guides as needed.
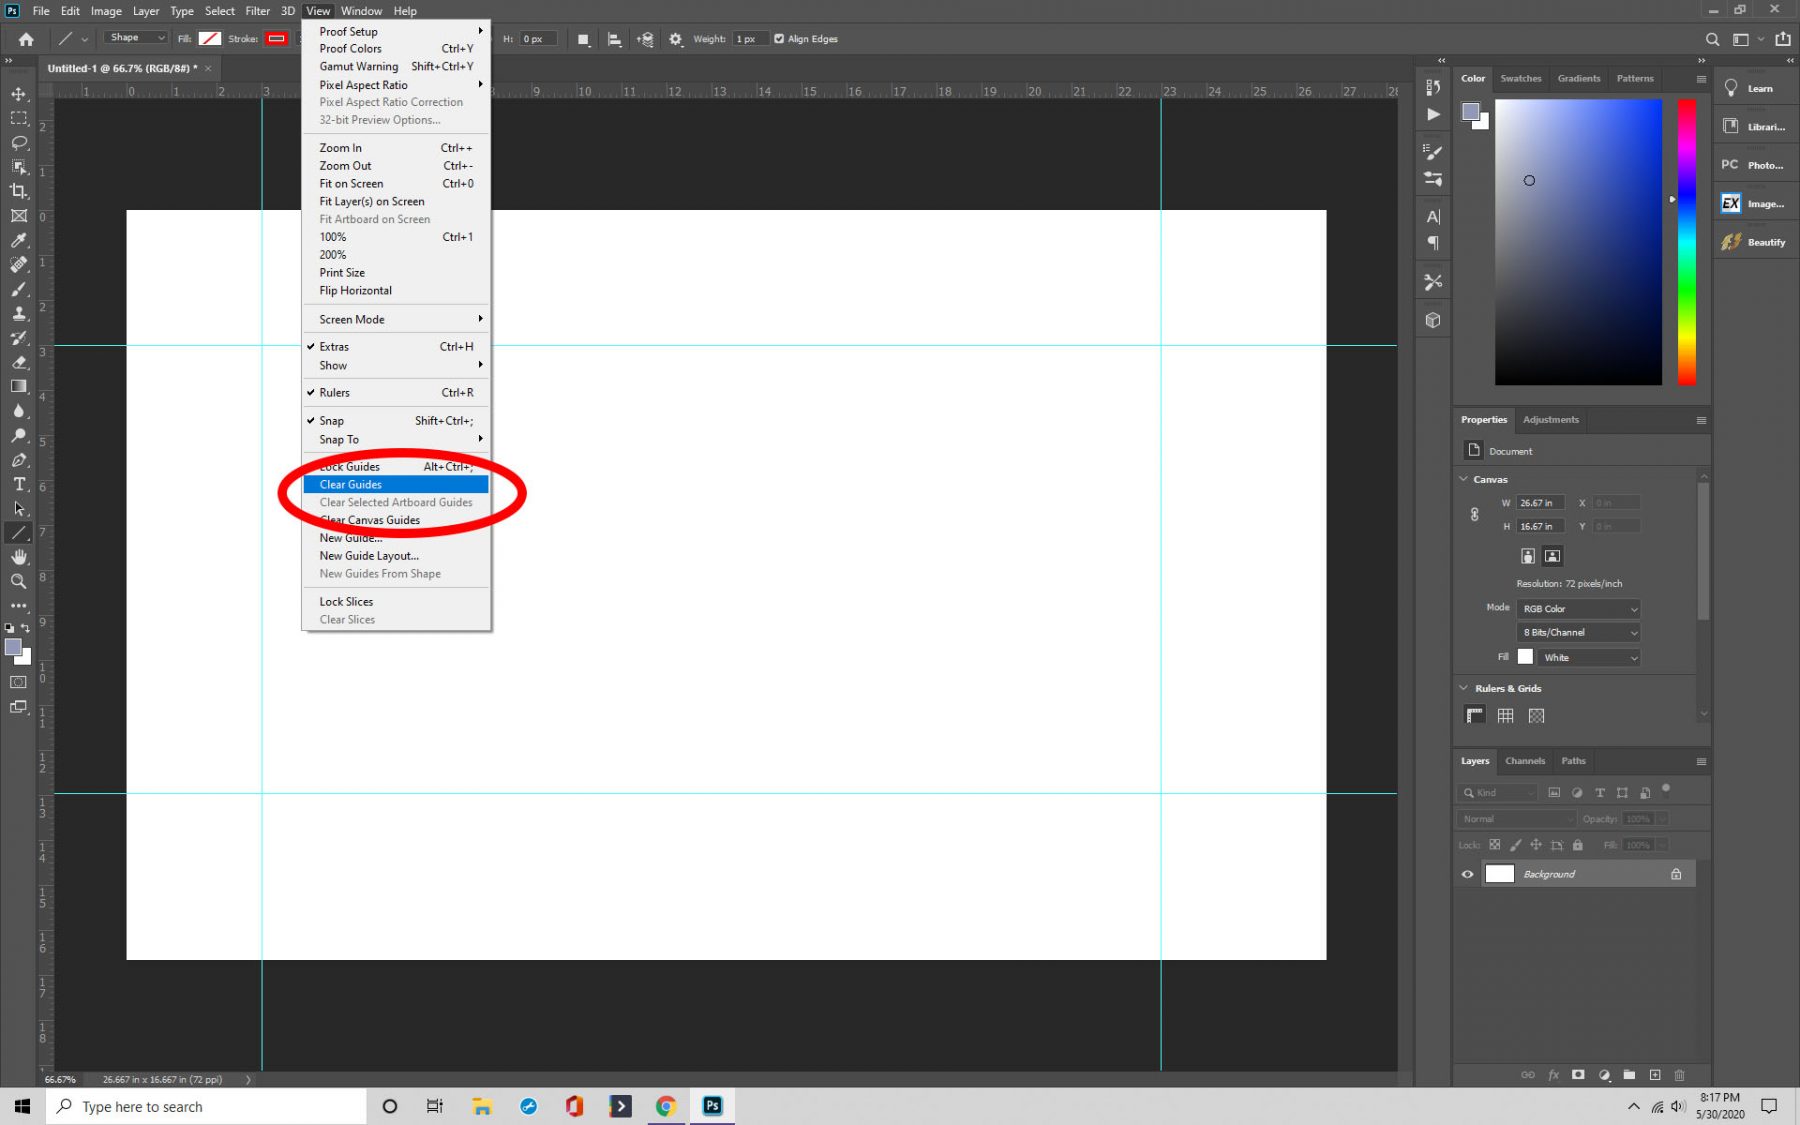
If you want to hide them, click View > Show > Grid. They will now be hidden. And to remove them, navigate to “View,” where you’ll find “Clear Guides.”
Final Thoughts
Making a grid is useful for many things, especially things like landscape or architecture projects. We recommend learning how to use grids to get the most out of your Photoshop experience.