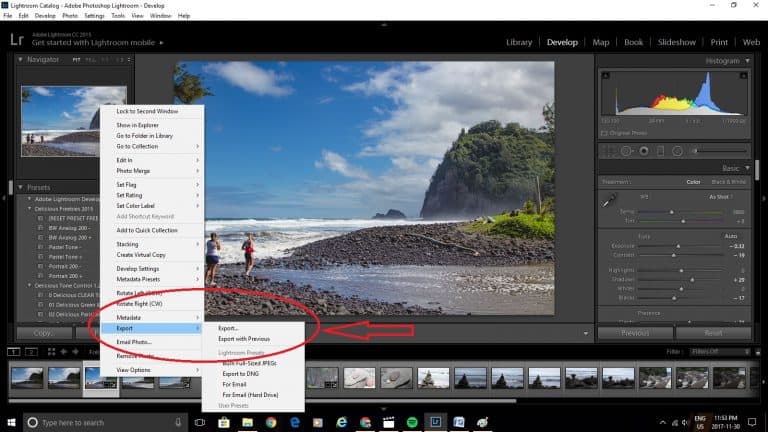
We already know Lightroom is an amazing tool for organizing and editing your photos but at some point you might get a little tired of seeing the “Adobe Lightroom” image banner in the upper left hand corner of your screen. The good news is, you can easily change it and add your logo into Lightroom and today I am going to show you how!
There are many reasons why you might want to create your own unique custom Lightroom identity plate… for example, if you are creating slideshows for your clients it sure is nice to be able to include your own logo and branding to go along with it, or maybe you just want to see your own company name in Lightroom every time you are working in there, or maybe you hate the font choices or colors that come with Lightroom for the module links. For whichever reason, you can easily change that as well and help make Lightroom a little bit cozier for you 🙂
Prefer to read? I got you covered…get your read on below!
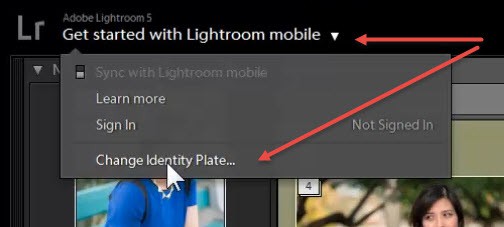
Step 1 – Whether you are on a PC or a Mac you need to get into the “Identity Plate Setup” menu option. On a PC it is under the Edit menu as shown. Alternatively, another way you can get to it is clicking the little sideways triangle next to the default Lightroom identity plate & logo.
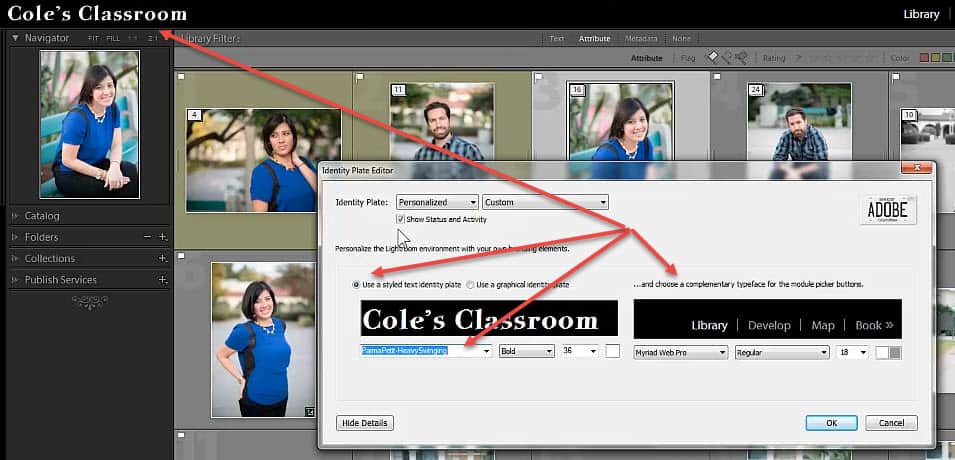
Step 2 – The next step is simply to choose “Personalized” Identity plate, this is what will give you your options to upload and/or customize with the text editor. See the below screenshot showing this step.

Step 3 – At this point you have a few options. If you already have a logo that you can upload, perfecto! All you have to do is simply select “Use a graphical identity plate” and then click the button that says “locate file” in which you will find your logo file and voila, it’ll now be in Lightroom for you! Please note, for best results you should have your logo as a transparent background .png file.

If you don’t have a logo, don’t sweat it – you can simply use the text editor and create your own custom identity plate that way! Just simply click on the “use a styled text identity plate” option and then you’ll have the ability to write whatever text you want, select a font, size and color to go with it 🙂
…also – regardless of if you upload your own logo or create one with the text editor, you can make custom font, color and size selections for the Lightroom modules as well as the small arrow below shows you.
[ad id=’1′]
Summary & Resources
As you can see, Lightroom makes it pretty easy to customize and add your own logo and branding to it. This especially comes in handy if you are utilizing the Book module, Slideshow module or Print module within Lightroom.
The video shown above is only a small excerpt of my comprehensive, step-by-step Lightroom training workshop titled “Becoming a Lightroom Expert Quickly & Easily” in which I divulge all of my tips, tricks and secrets to make you a Lightroom master in only a few hours!