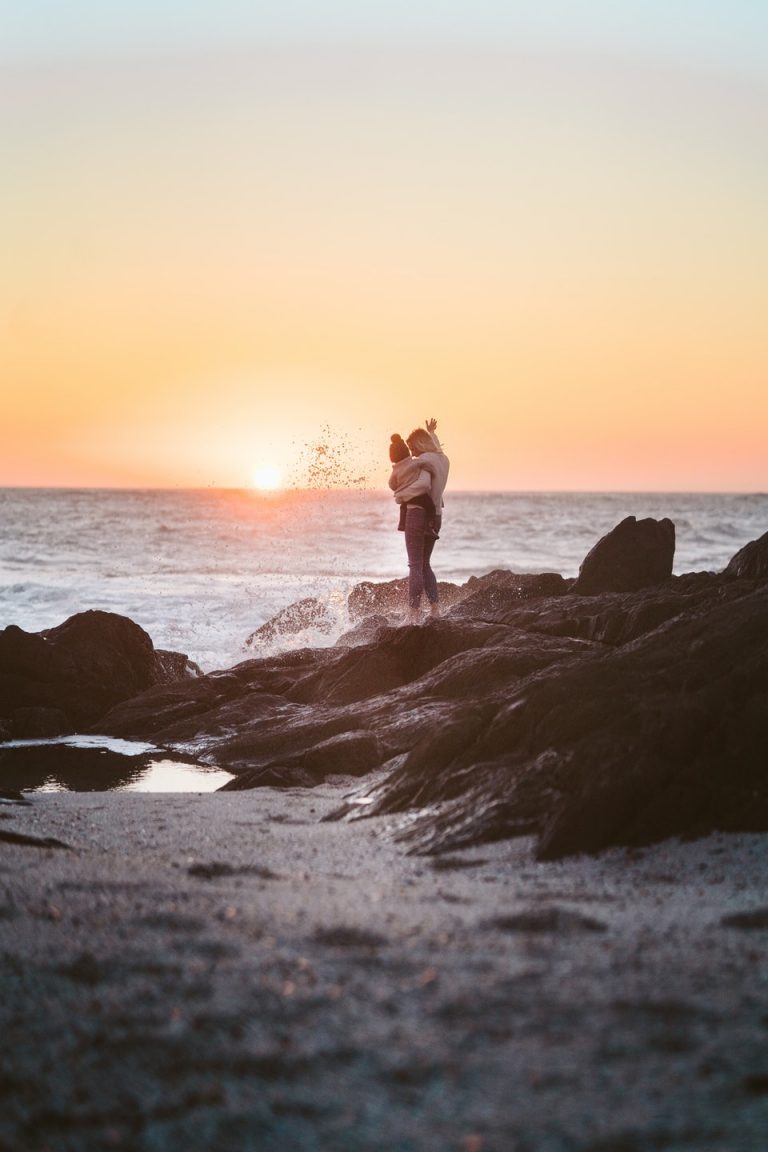

We all do it. We make sure we take our cameras with us when we “go” places. Whether to a birthday party or far away travels, we typically make sure to grab the camera. Sometimes on our travel excursions you might become frustrated when you are snapping photos of a truly amazing or majestic scene but then looking at your camera and realizing the photo just isn’t doing the place any justice!
Looking to improve your photography? Just enter any questions you have about improving your photography below and hit send and get answers & feedback instantly - for FREE! Submit QuestionsIt happens all the time – and landscape photography is certainly a skill in itself. But today I want to show you how you can transform some of your landscape photos from “ordinary” to “extraordinary” in only 5 easy steps – all done within adobe Lightroom!
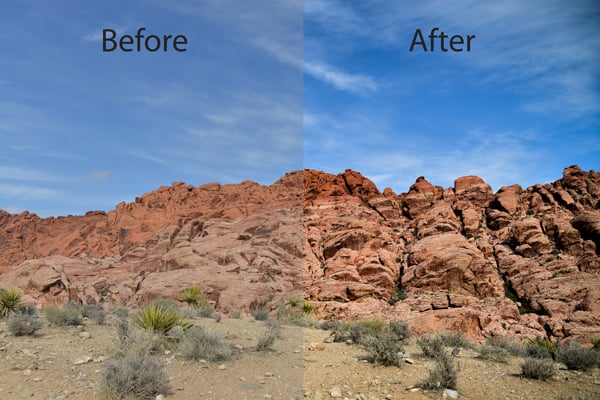
Lets walk thru these 5 steps that I took to drastically enhance an image I took from a recent trip to Red Rock Canyon in Las Vegas, NV a couple months back during our Christmas trip to Vegas. If you are curious into the technical aspects and what gear I used, this image was taken with my Nikon D800 & my 28 f/1.8G lens @ f/5.6, ISO 100 & 1/800, shot in JPG.
One aspect that really can make or break your landscape photos is depth. Our natural eyes can perceive depth in a scene much better than our cameras can. From a composition standpoint there are many things that can help you improve your landscape photography, when you are shooting it, one of those things is having foreground & background elements to your photos – this helps convey the depth of the scene! This is especially true when using ultra-wide angle lenses that can really flatten out an image.
In my case of this particular image though, the shot straight out of the camera was lacking. The colors of the rocks and sky were subdued since the sun was hiding behind clouds, we were at a lookout point which didn’t let us get close to convey depth and the photo just really didn’t do the true scene justice. I was really inspired though by how cool it looked in real life so I wanted to make some minor tweaks to really bring this image to life.
Ready? Here we go…
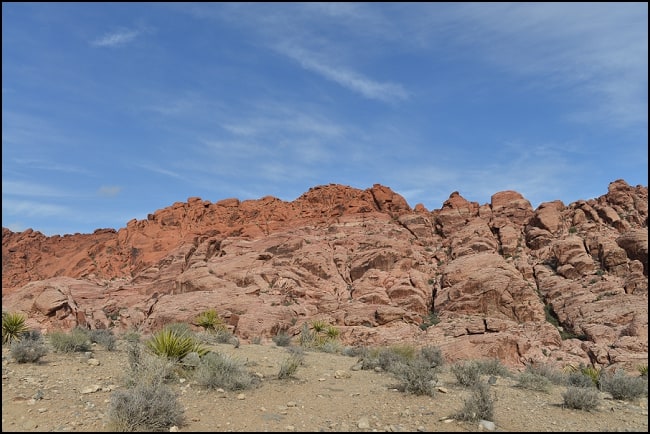
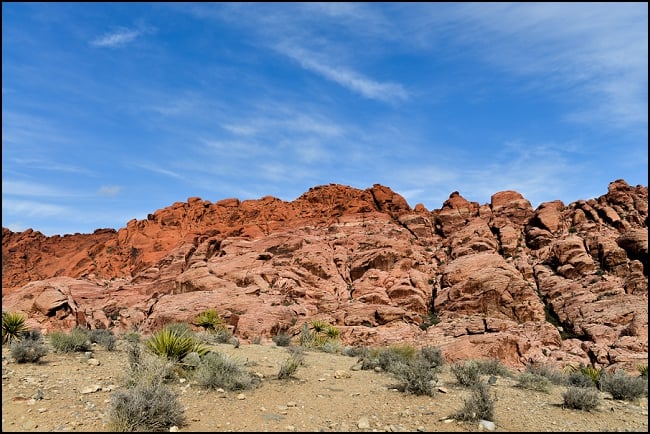
Our starting point – image straight from camera
Step 1 – Work on Exposure & Contrast

My goal at this stage is just to really boost the contrast to bring in some depth and detail to the sky and rock formations
Step 2 – Add Clarity & Vibrance

Adding just a bit of clarity & vibrance to help give some “pop” and color. The difference is subtle but that is OK because my goal is keep it as natural as possible but yet still enhance.
Step 3 – Enhance Color of Rock

Note: sliding the red & orange sliders down (to the left) brings more red hues into the image, while the saturation of those colors is slightly boosted to enhance effect.
Step 4 – Add Lens Vignetting

This is totally personal preference, I personally think a light vignette darkening the corners a bit looks nice against the blue sky.
Step 5 – Add Graduated Filter to Enhance Sky Clarity

Here are my settings I used for the graduated filter – I didn’t enhance the contrast anymore because the sky would begin to look unrealistic, which I didn’t want. Adding clarity to the sky really gave a nice look for the clouds in the sky.

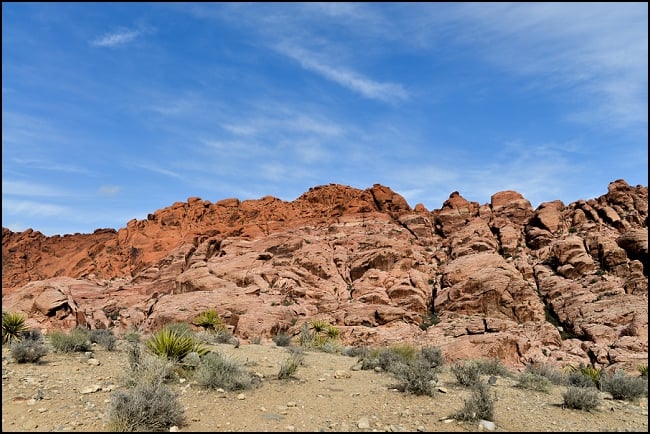
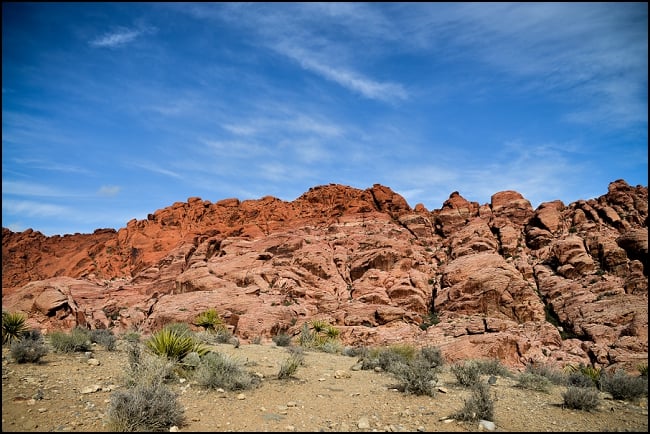
The Final Image!
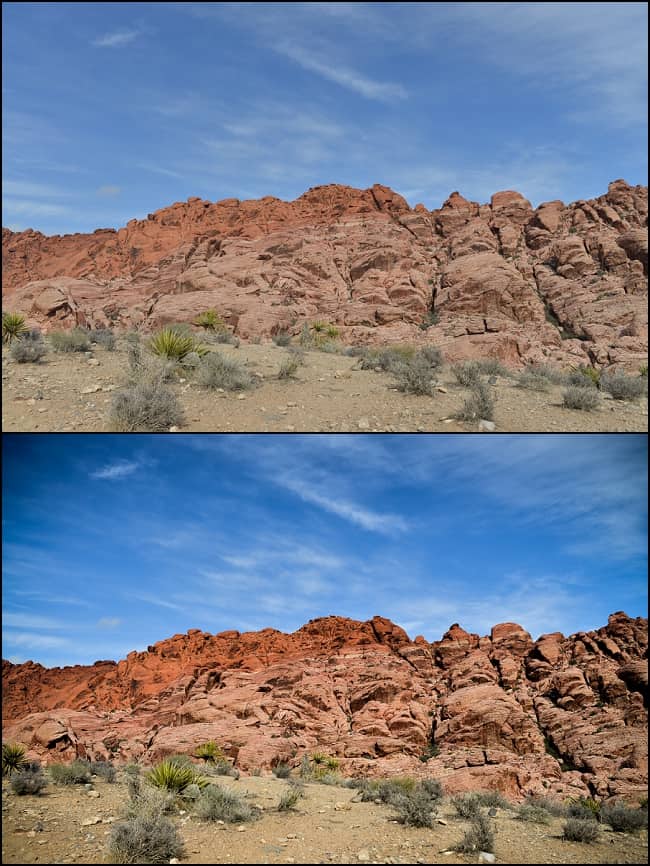
To visibly see the starting point and the final image…
I hope you enjoyed this quick photo editing tutorial and shows you how you can really enhance an image and turn it into something you absolutely love. For more hands on photo editing tips, feel free to visit our YouTube Channel where you can find many other of our Adobe Lightroom Video tutorials.
Till next time.
Cole