


If there are clear skies where you are, knowing how to photograph the milky way means you can get some impressive shots from a wide range of locations. Milky way pictures are a staple for many photographers, and you can find an ideal spot despite the level of light pollution in your general area.
Looking to improve your photography? Just enter any questions you have about improving your photography below and hit send and get answers & feedback instantly - for FREE! Submit QuestionsPlanning Out Your Shoot
Planning out your milky way picture will help you situate yourself in the best area for an optimal picture of the stars. Many photographers use various methods for this planning so they can minimize post-processing, and ensure they get as much light as possible from the stars in the milky way shot.
Let’s discuss our main milky way photo tips for getting started as you plan out how to shoot the milky way.
Look to the South to Find the Core
In the southern part of the sky, you’ll find the galactic core, whether you live in the northern or southern hemispheres. Keep in mind that where exactly you see the milky way and how visible the milky way is will vary with the seasons, the weather, and other factors, so you’ll want to consult other sources of information to ensure you’re able to shoot the milky way successfully.
February through September is the best time of the year to see the Milky Way if you’re in the northern hemisphere, and the milky way rises from the east each night. You’ll want to find the darkest sky possible so you can clearly make out the bright star in the Sagittarius constellation.
Location, Direction, and Elevation
If you are visiting the same location on two different dates, you can look to the same part of the sky to photograph the milky way. To shoot the milky way exactly the same each time, it requires that you seek out the same elevation and constellations as reference points, but the galactic center is always rising in the same direction and setting in the same part of the sky.
Even though the galactic center is at the same elevation, you’ll need to adjust your camera for each shooting spot you try out. To photograph the milky way, you can try out different locations in the same area and adjust your camera to incorporate any foreground items you want as you would with other night photography shoots.
Know the Moon Phase
Photographing the milky way during a full moon will result in washed-out images thanks to the light pollution from the moon. For the best milky way image, you’ll want to shoot the milky way during a new moon, or when the moon is as minimal in the sky as possible so you can practice night photography and shooting the milky way without that powerful source of light in the way.
Even as little as a quarter moon can significantly impact your milky way image, and correcting the resulting washed-out look in the milky way image means lots of work editing the photo later. Since you’ll be using the maximum aperture allowed by your lens and extended exposure time, you can rest easy about how dark it will be during the new moon and feel confident you’ll get good milky way images.
The easiest way to determine the moon phase at any part of the year is to look it up online or use an app on your smartphone. There will be several days each month where the moon is in an ideal spot in the sky for night photography, and software like Stellarium and PhotoPills are very useful for determining the best days to shoot the milky way.
About the Milky Way and the Galactic Core
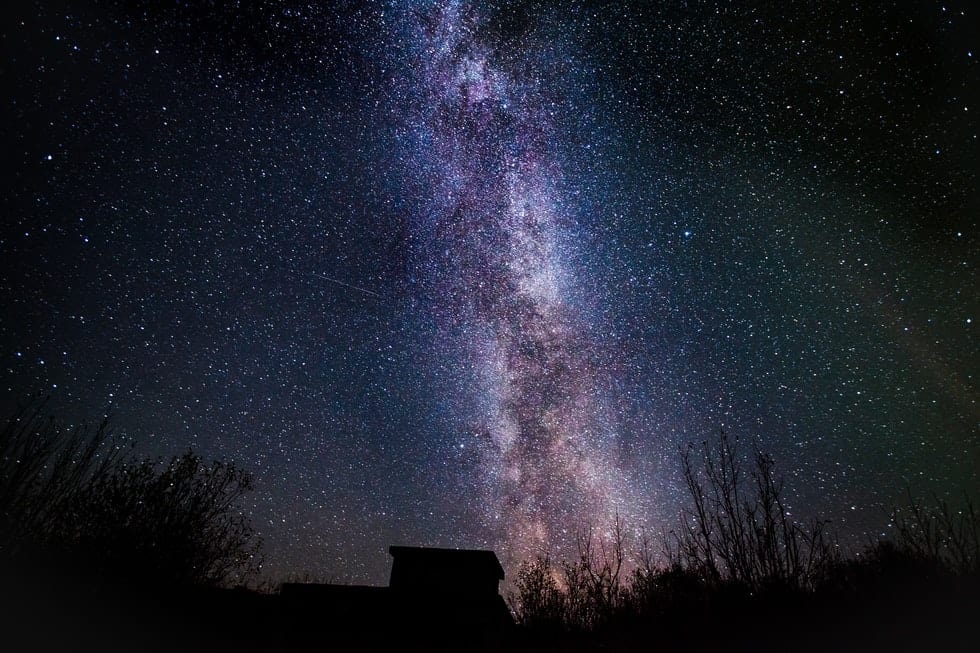
The Milky Way is named for its appearance from our view on earth, and this galaxy is where our solar system resides. The Milky Way appears as a hazy or milky band that illuminates part of the night sky with a soft glow, and the individual stars aren’t visible with the naked eye, which gives it a mysterious glow in dark skies.
The glowing effect becomes lessened when increased light pollution is present. To photograph the milky way, you’ll need to use specific camera settings to adequately capture the depth of color and the light that makes this phenomenon so intriguing.
When we talk about the galactic core, we’re specifically referring to the center of the Milky Way. This point is also called the galactic center, and it’s the rotational point of the milky way galaxy where all of the stars and other matter in the galaxy move around.
To give you an idea of how dense the milky way galaxy is, you can find approximately 10 million stars within a single parsec of the galactic center of the Milky Way, and the center is a supermassive black hole with immense power.
The Milky Way is brighter near the constellations of Scorpius, Ophiuchus, and Sagittarius, and there are a significant number of stars near the center of the milky way, including red giants, massive supergiants, and younger stars like Wolf-Rayet stars that formed about a million years ago.
One of the features of the Milky Way that makes it so enticing to photograph is the amount of dust and color in the sky that you can capture using your camera and the right settings. The appearance of the Milky Way also changes slightly based on the time of year and your location.
Many photographers get different milky way looks by altering their camera settings or by using post-processing techniques. If you keep up to date on various astronomy-related phenomena that are happening, you may also have the chance to capture these fluctuations if you are in the right place at the right time.
The Season for Milky Way Pictures
It may seem odd, but there is definitely an ideal time of the year to view the milky way, depending on the hemisphere where you reside. In the northern hemisphere, you’ll look to the southeast during the spring and due south in the summer months. By fall, you’ll want to look at the southwest slightly and make sure the skies are clear.
In the southern hemisphere, it’s a bit different as you’ll be looking to the southwest in the spring season and the southeast in the fall and winter months. Even with maximum elevation, the northern hemisphere isn’t the ideal location for viewing the milky way as the core is very close to the horizon line, but you can make it work.
The southern hemisphere is a better option as the core is higher up in the sky at night, which makes it easier to capture milky way images of higher quality. The core of the milky way may even be above your head when you’re in the southern hemisphere, which is ideal for stars pictures.
With the milky way higher up in the sky, you have many more options for composition, and you can photograph the milky cluster of stars from different locations and in a different way than your previous shots.
If you’re stuck in the northern hemisphere, you can still get some cool images of the milky galaxy, but they’ll likely have some other points of interest in the image, and you’ll want to shoot with those obstacles in mind.
How to Find an Ideal Location for Shooting the Milky Way
Once you’ve determined the lunar phase and you have dates for your night photography shoot, you’ll want to shoot in a location where there is minimal light pollution so you can capture as much of the light coming off the milky way as possible.
Near cities and other locations with lots of artificial lighting, you’ll have trouble getting a good view of the stars, milky way, and the night sky. Even a bright star is easily washed out by city lights, so you’ll want to seek out a location several miles away from that much light. For some people, this is a short drive out of town, but for others, it could mean a road trip several hours long.
Even when you can’t see light pollution with your eyes, your camera will pick it up in the form of washed-out images and faint photos of the milky way. You can use a website called Dark Site Finder to locate the best spots near you with low light pollution, and locations like national parks and other wilderness areas are usually at the top of the list.
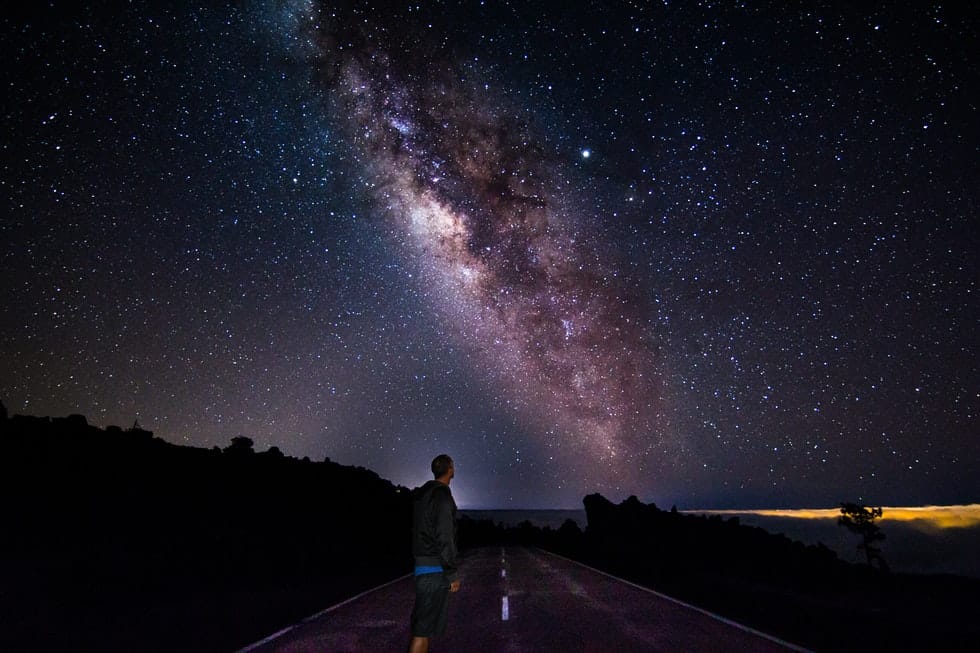
Incorporate Additional Points of Interest
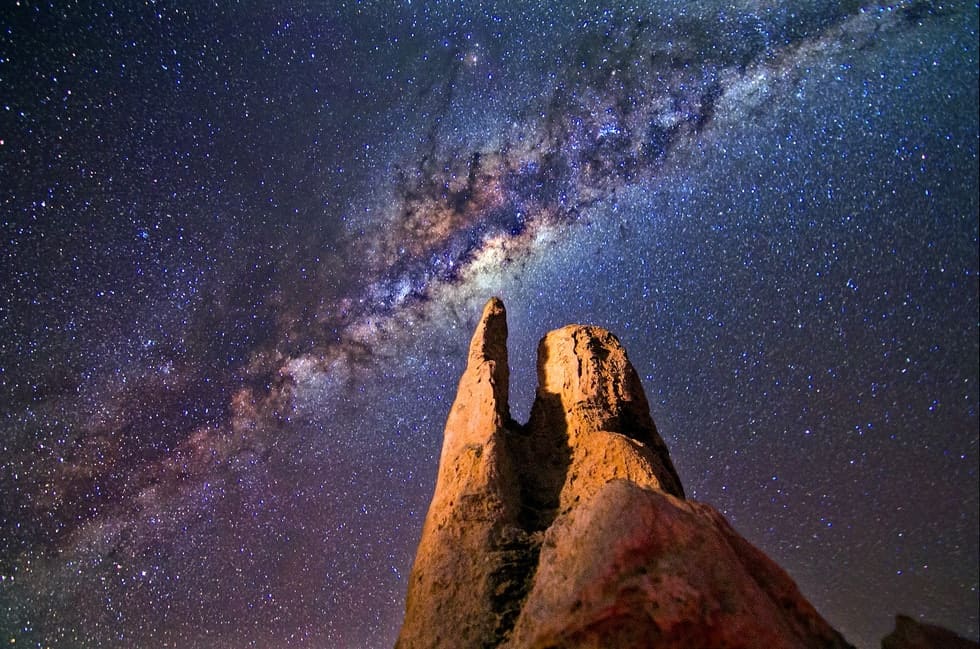
Adding points of interest to your images of the night sky can make them more compelling and further accentuate the colors that the milky way casts across otherwise dark skies. Adding points of interest to your image will also attract more attention and make it feel like you are connecting two alien worlds. Here are some ideas for points of interest you can easily add:
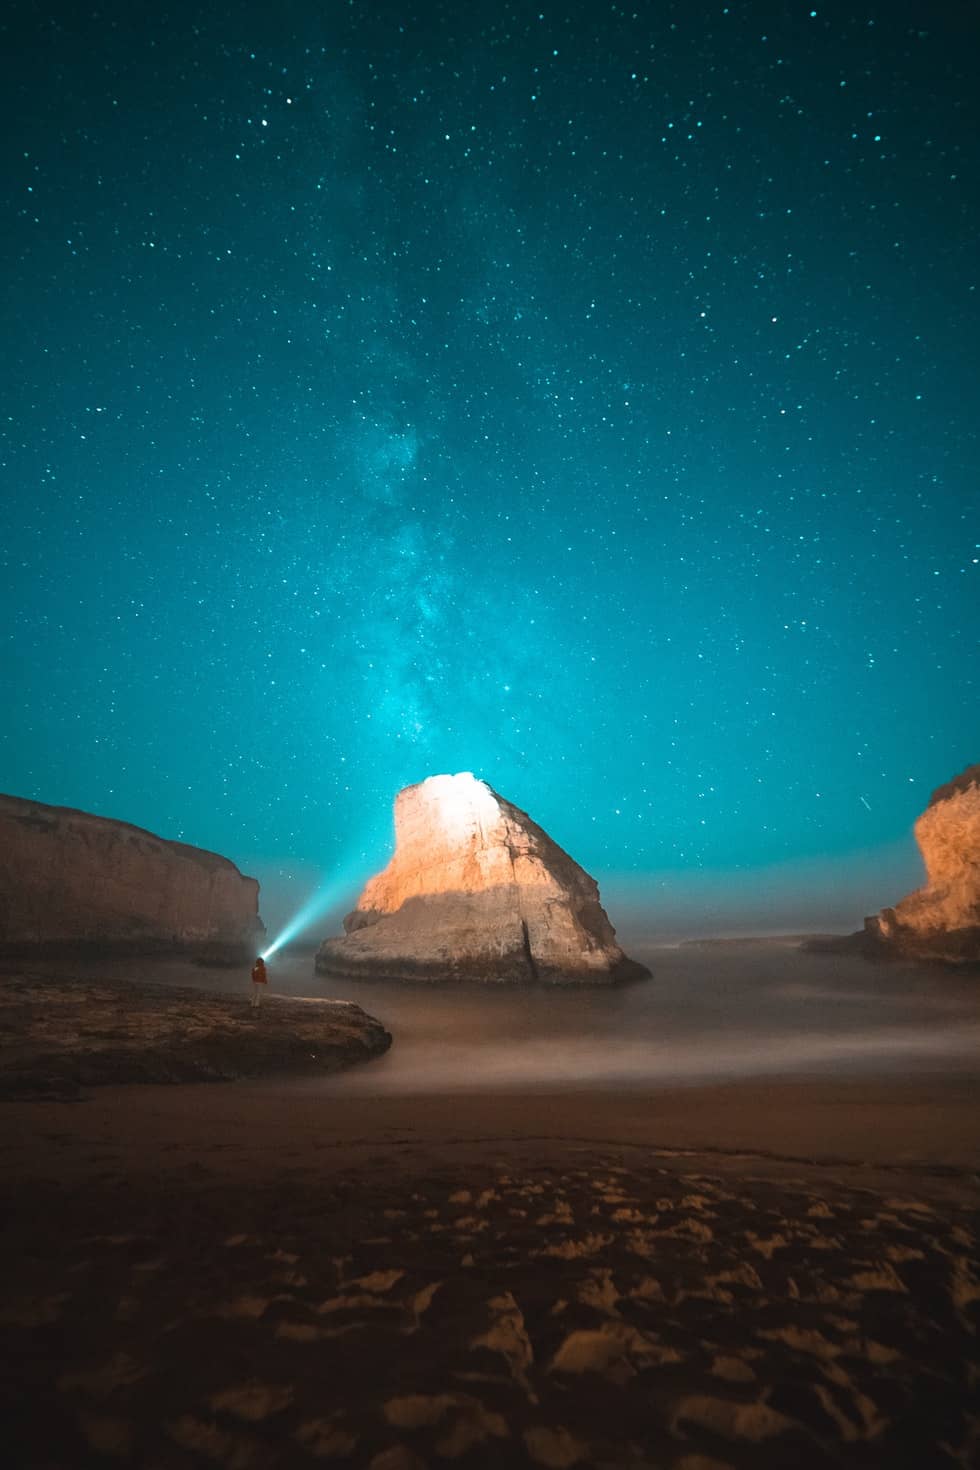
- Rocks and rock formations
- Natural arches or bridges
- Lighthouses
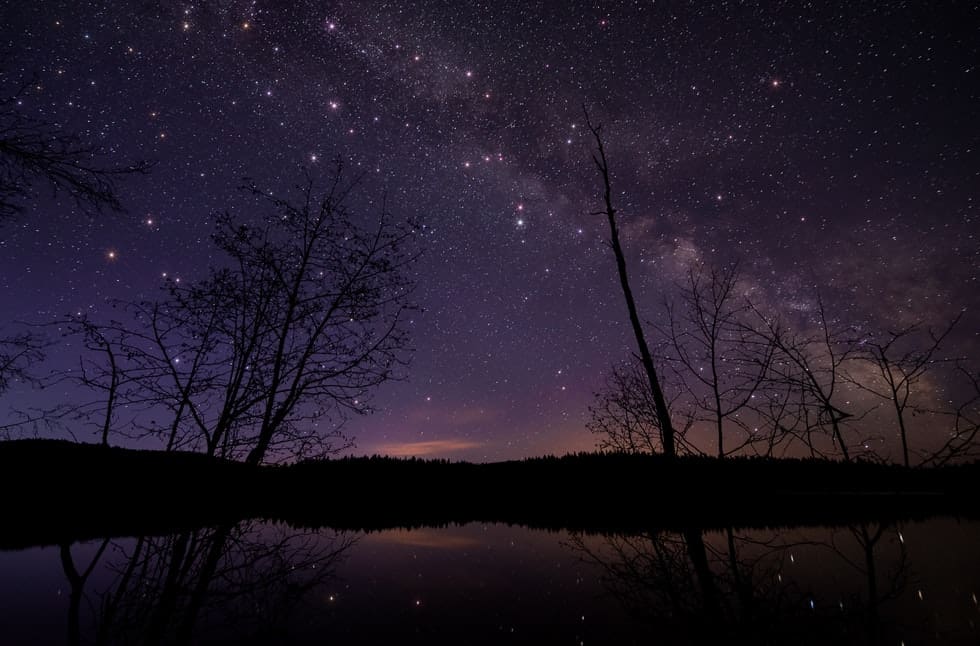
- Forests or Trees
- Ruins and old buildings
- Models or statues
Some of these items are useful for breaking up the horizon line and adding variety to your milky way photography. Picturesque lighthouses, megaliths, and other structures can also allude to historical events or hidden stories that intrigue viewers.
When you add items in the foreground of your image, you also provide the viewer with a sense of scale and emphasize how much light comes from the sky. It’s also a perfect opportunity to add layers of texture and spark emotion with an image or tell a story of your own.
It’s also lucky that many of these points of interest reside in places where the skies are dark enough to photograph the milky way. If you’re looking for ideas, you can do an online search to find the closest points of interest near you.
Find Hidden Stories and Places
Many locations have hidden history or stories that you can illustrate or draw attention to when you photograph the milky way. Ghost towns, craters, cemeteries, and volcanoes have a distinctive atmosphere about them that comes through in your images of the milky way, and you can get creative with how you capture these photogenic places.
If you need inspiration or leads on where to look for these places, you can check out photos online on sites like Instagram, 500px, Flickr, and Google Images. Some photographers are kind enough to share the location where they captured their photos, and you can use travel guides to get a better idea of what the area is like so you can prepare.
Find Other Sources of Information
A planning app like PhotoPills is also a useful tool for planning out your visit, and Wikipedia has numerous lists of interesting places by category. You can also inquire with the locals in the area to see what they recommend or look at reference books that detail unique attractions in the area.
Another way to gather useful information is to check out the local visitor’s center or City Hall. If your town has a Culture or Tourism center, these are helpful resources that often carry specific guides, and you can talk to the people that work there for insider information.
You can also look for museums in the area, and smaller ones are often more informative than larger, more well-known establishments. It’s also worth checking online forums to get the latest info from other photographers that have visited the area to find out what you should shoot other than the milky way, so you know if you need to bring other photography equipment.
Consider Adding a Shooting Star
Meteors or shooting stars can take your milky way photo from impressive to legendary. It’s worth checking out a meteor shower in an area with limited light pollution so you can photograph the milky way and capture epic streams of cosmic rock as a unique point of interest.
It’s worth checking online to see what the best meteor showers are, as not all of them are created equal. You’ll still use an aperture around f/2.8, a long exposure, and a high ISO, so it’s not any different from other night photography. Once you capture the image with your camera, you can adjust different aspects of the image, such as the white balance in editing software.
Visualize Your Shots In Advance
Before you go out into the field to take your milky way image, consider these items so you can plan through each one before leaving home:
- Use exact location coordinates
- Put the location into Stellarium
- Use resources like Stellarium or PhotoPills for thorough planning
- Be clear on the direction you need to face
- Know what the best time is for photographing the Milky Way
- Use smartphone apps specifically intended for night time photography
As you think through the details of your shots, consider what equipment you’ll need, such as a special lens or other accessories and what you’ll need duplicates of such as batteries. Although you can do a lot with one lens if other photograph opportunities arise, you’ll likely need extra SD cards, and batteries to extend your working time.
Be Aware of Your Location and the Conditions
Awareness of your location and the conditions you’ll be shooting in doesn’t just help guarantee that you’ll get great milky way images, it also ensures your general safety.
Regardless of how safe or comfortable you believe your milky way shooting location to be, it’s always a good idea to bring along a few essential items and to keep some general information in mind as you decide how to photograph the milky way.
Weather, Humidity, and the Right Clothing
You’ll want to photograph the night sky on a clear evening when there are minimal clouds and a new moon. Any amount of moon, even a sliver, will add light that alters your images and washes them out. Night photography can also be chilly depending on the time of year and your location, so pack a blanket and wear the right clothing for the conditions.
If it’s going to rain, you might want to consider rescheduling as rain usually brings along clouds that block the milky way. However, if you’re going to try and wait it out, a rain shelter or a place to hangout nearby where you wait is ideal. A sealed camera body is also needed for high humidity environments to protect your device from moisture and other debris like sand and dust.
Choose the Right Part of the Lunar Phase
During a new moon is the best time to photograph the milky way, as this will ensure the darkest night and images that are free from excessive light you’ll have to correct for later in editing. Low light conditions are ideal for capturing the best images of the milky way and during the new moon, which is when there is no visible moon in the sky.
You can find out the lunar phase by doing an online search, or using one of many apps available for your smartphone.
Find a Dark Sky
Light pollution is your biggest enemy when it comes to photographing the night sky and the milky way, so you’ll want to make sure and set your camera up in an area where you have low light pollution and an unobstructed night sky.
Night photography often takes place late in the evening, and you can do an online search to find the perfect time for taking shots in the area you want to visit. Knowing when the sun sets and rises can also help you plan your time, so you capture the peak milky way display.
Capturing the Milky Way
Using a high ISO is a vital milky way photography setting as it tells your camera how sensitive it needs to be when collecting light during a shot. When you combine a high ISO with a wide aperture setting, you can capture a lot of the milky way without many other adjustments aside from focusing.
High ISOs are not an option on every camera, and many entry-level cameras don’t let you have an ISO much over 3200. Even with an entry-level camera, you can still add foreground interest to your milky way picture with minimal lighting or accessories. To achieve this, you might have to plan ahead more thoroughly than if you used fancier accessories.
Taking your milky way shots to the next level is also something you can work on when you edit them using photography editing software. Using editing software, you can work on specific elements to create a more balanced milky way picture and remove noise and aberrations that cause fuzziness and color casts.
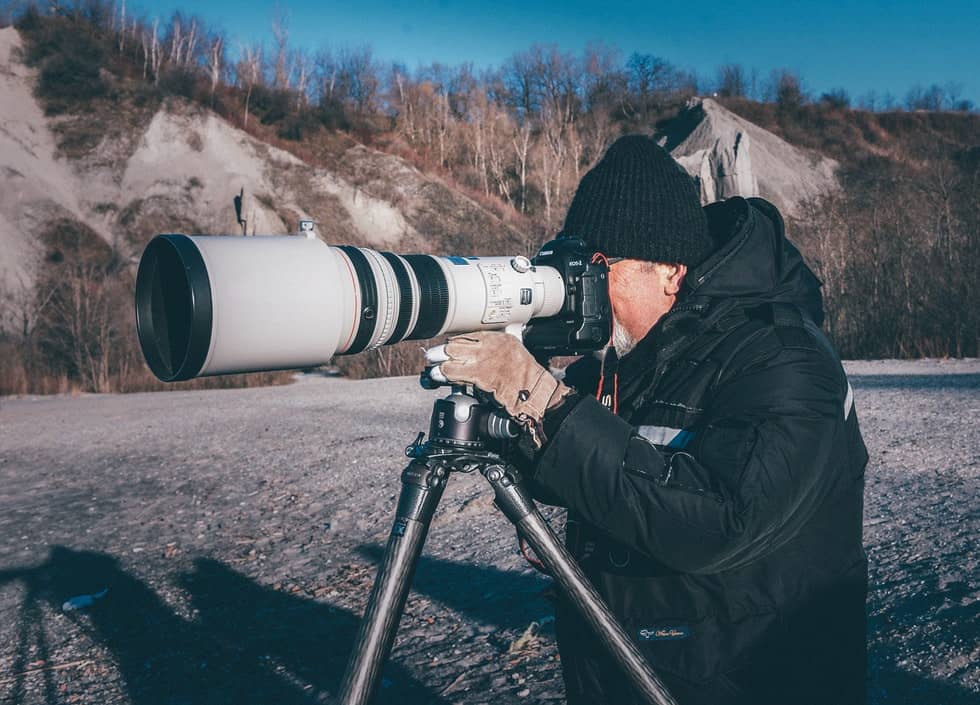
Gather Your Gear
Once you know how to photograph the milky way, it’s time to gather your equipment and finish planning your trip. Below are different levels of equipment that we recommend for milky way photography, which includes your camera, and a good wide-angle lens.
Making the Most of Beginner’s Equipment
Even if you’re a beginner or have equipment that is less fancy than what’s available, you can still achieve fantastic results in your images, and photograph the milky way in great detail. Here’s the basic list of equipment you’ll need to get started:
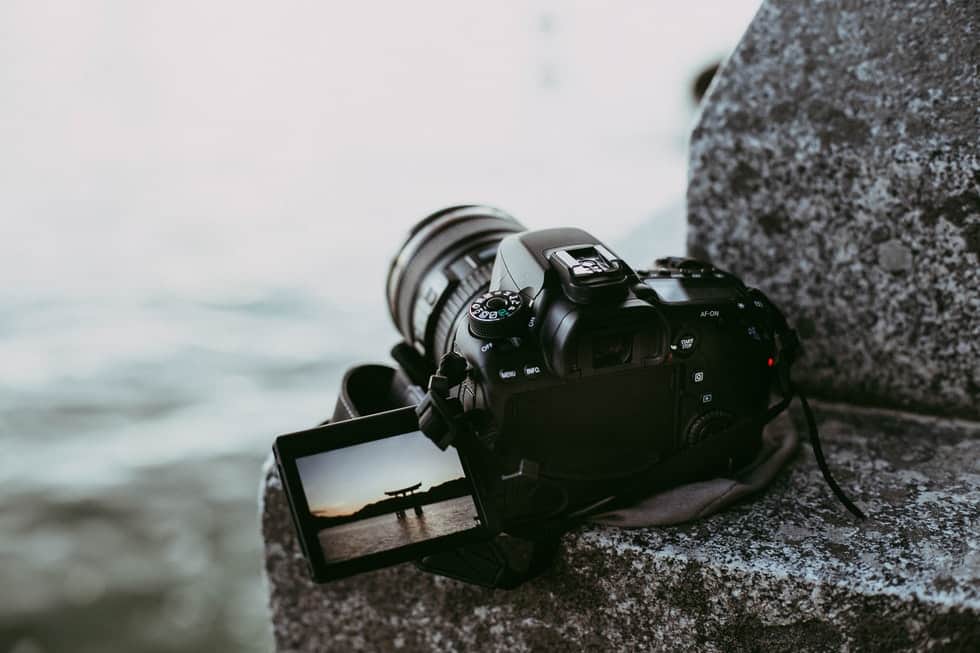
- DSLR Camera (look for one that allows an ISO 3200 or higher)
- A good 18-55mm Lens
- Travel Tripod (not a monopod)
- Headlamp
- Remote shutter release or an intervalometer
- Memory cards (at least two)
Even if you only have the basic version of all of these things, you can still shoot the night sky and the milky way. Keep in mind that it’s more important to know how to use your equipment well than it is to have the most expensive items.
If you have a good idea of how to use all of your equipment, you’ll be able to find unique workarounds as you test your shots. Also, a firm understanding of your camera’s settings and how to adjust them to achieve better images will allow you to do more with basic gear than you might think.
One drawback to using a basic DSLR or mirrorless camera is that it likely won’t allow you to shoot at a high ISO 3200 or greater without creating noise. One advantage to these cameras though, is that they typically come as part of a kit with at least one lens, and to the untrained eye, your images won’t look any different from the professionals.
Mid-range Gear
Mid-range gear will give you a better result than beginner gear, but only if you know how to properly use it and your camera’s settings. Before you set up your location, you’ll want to gather the following items:
- DSLR or mirrorless camera (doesn’t have to be full-frame, but higher ISOs are a plus)
- A good quality wide-angle lens
- Headlamp and flashlight
- An adjustable tripod and head
- An intervalometer
- At least two larger capacity memory cards
Once you get to the mid-range gear, the chances are that your camera settings will allow you to do more experimentation with the settings than you could do with more basic devices. For this reason, you’ll want to make sure you have plenty of memory cards on hand as shooting in a RAW format does create images that take up a bit more storage space.
The rest of the equipment is fairly similar to the basic list, but with the caveat that you should get higher quality items that are more durable. Headlamps are still an excellent option, but you can get lightweight ones or headlamps with more light settings that make working at night easier.
You may find yourself shooting while standing on uneven ground, which makes having a highly adjustable and good quality tripod essential. You should also plan to invest a little more in a good wide-angle lens and possibly a light pollution filter.
Mid-range DSLR or mirrorless cameras also have more versatility when it comes to setting the ISO, but they don’t have the same variety of options that a higher level camera does when it comes to ISO levels.
Professional-Level Equipment (High-end Gear)
For a professional gear kit for milky way photography, you’ll want to collect the following equipment:
- Full frame, DSLR, or mirrorless camera (these allow for high ISOs generally)
- A good wide-angle lens
- Lighting equipment (for lighting points of interest)
- A flashlight (with appropriate gels if you use them)
- A good quality headlamp (with red night vision light or other colored light)
- Lightweight and adjustable tripod and head
- An easy to use intervalometer (built-in or separate)
- Several memory cards
- Extra batteries
- For timelapse photography: dollies and sliders
- A star tracker
- A leveling tool (digital or bubble is fine)
- High humidity protective equipment (such as a protective camera case)
- A hood (first defense against moisture)
- Portable fan (to reduce dew and prevent condensation on your lens)
- A dew heater (heats the lens to prevent condensation)
This list may seem like a lot of stuff to lug around with you to your location, but a lot of it will make your life easier and help you take noticeably better images. Milky way photography also demands that you spend a bit of time setting up your image and altering your settings, which might involve using the focus ring for manual focusing on specific points.
Besides using the focus ring, a wide-angle lens is also a very helpful tool so you can capture all of the milky way in your images using the appropriately high ISO that is typically much more possible with a professional level camera than a lower level one.
To photograph the milky way, you’ll also want to do some test shots, and having several memory cards on hand ensures you have the storage space for your RAW image files.
Using a higher level of equipment will ensure you get the best image of the milky way, but you still need to know how to use your lens and camera combination well with your other accessories so you can minimize light pollution noise and avoid excessing post-processing time.
You’ll also need to know how to figure out settings like ISO, focus, and the histogram, which often have higher levels of detail available in terms of functionality. A higher ISO is an important feature that helps your shots of the milky way appear more professional.
Comparing Basic, Advanced and Professional Equipment Performance
As you look at different equipment and how it performs, you’ll notice that some items are priced much higher and offer better performance or more features. For example, pricier SD cards often transfer data quicker, which makes offloading your photos a quicker process.
Likewise, buying the best possible camera you can afford will help you take better images regardless of the light in the environment, and allow you to use different lens types to create various effects. You’ll also get the option to use a higher ISO, and utilize a wide-angle lens with a variety of automatic features like autofocusing or stabilization.
A full-frame camera uses sensors that are the size of a single frame in a traditional 35mm film. This sensor size is about 2.5 times greater than the typical APS-C sensor you’ll find in a typical DSLR or mirrorless camera, but there are drawbacks to consider, and not all full-frame cameras are compatible with all lens types.
Other equipment like tripods, batteries, intervalometers, and protective equipment are vital accessories that help you to photograph the milky way more easily. Light and light pollution aren’t the only factors your equipment will help you contend with during your shoot, and you’ll likely find yourself making tweaks to your equipment on the fly.
You’ll also need to fight the weather conditions, so having a tripod and head that can stand up to wind is vital. Other accessories like hoods, fans, and dew heaters are helpful for preventing condensation and dew from forming on your lens and other delicate equipment and ruining your image of the milky way.
Getting the Composition Right
There’s a lot that goes into capturing the milky way, but eventually, it’s boring to have only the milky way in your shots. When you add other elements to your pictures, you get the benefit of scale so you can appreciate the milky way and other things in the shot while also adding necessary interest that captivates a viewer.
Picking a Set Up Location
Picking your location is vital as it’s where you’ll decide what other items to include aside from the milky way. You’ll also want to have the darkest skies possible, so avoid areas with a lot of unnatural light nearby.
Some remote locations seem like a good idea, but having to hike several miles in the dark can be dangerous. Choose locations where you can camp nearby or at least navigate to safely when it’s dark outside.
Foreground Objects and Light Painting
Mountains, trees, cliffs, water, and other obstacles in remote locations make ideal additions to your foreground, but you’ll want to select them carefully. Too many objects in the foreground and your picture will end up looking cluttered. If you have too few objects, then more emphasis is placed on capturing the milky way.
Setting Up Your Camera for Milky Way Photos
Many new photographers are interested in shooting the stars, but milky way photography requires specific camera settings that may not be as obvious as some people think. With our guide, you’ll see the milky way clearly in your image with minimal post-processing, and get milky way images that are the envy of your photographer friends.
Our Quick Start Guide
The number one tip we offer when you want to photograph the milky way is that you should set up the exposure for the sky and not for the foreground in the image. This simple tip results in better images than if you add foreground interest, which is tempting for all of us.
When you start to add foreground interest to milky way images, it compromises the exposure you get of the light from the stars and results in a less dynamic image. So keep things simple, and stick to an exposure that’s most appropriate for the sky itself, so you see more of the milky way.
Aperture
When it comes to the aperture you need for milky way photography, it comes down to collecting as much light as possible during the exposure. Sky photography performed at night relies heavily on the camera and lens you use and the higher ISO, long exposure time, shutter speed, and a few other factors.
A wider aperture combined with the right lens can make for excellent milky way photography, and your aperture settings can vary from f1 to f4 or higher, but you might want to start around f 2.8 and do some test shots.
The smaller the number, the larger the aperture will be, and generally speaking, a good starting point is f 2.8, but you can always start lower than f2.8 at around f1.4 if you want.
You may want an aperture that is wider, around f 2.8, which you can get away with since you are focusing on one particular point. F 2.8 is not necessarily the maximum aperture you can use, but you’ll want to allow as much light as possible to get to the lens to accommodate a shorter exposure, and f 2.8 isn’t a bad starting point.
It’s also worth noting that f 2.8 is ideal if you want to add in some foreground stuff like a tree or lighthouse, but if you’re focusing only on the sky, you may be able to get away with an aperture other than F/2.8, such as f4 to increase the depth of the field.
Use the automatic exposure feature on your camera cautiously if you have it because the camera doesn’t always focus appropriately on the night sky. A higher ISO heightens the sensitivity of the sensor on your camera, which works well with a wide aperture for milky way photography as it collects more light.
Set Your Camera Manually
When photographing the night sky and the milky way, it’s best to focus your camera manually as it can have trouble acquiring the proper focal length using an automatic function.
When you photograph the milky way, you’ll also want to use the live view as part of your manual focusing so you can find the right focal length and set the focus for the sky, which is very far away instead of at the objects in the foreground.
Using live view, you can set the focus to an infinite value, and some people use a lens marker to achieve this, but a lens marker isn’t required. If you have an older lens, you can use lens markers, but this method is less precise.
Even if you’re only slightly off using the lens markers during live view, it can cause your stars to end up looking like glowing blobs instead of defined shapes.
Using your camera’s live view is the best way to achieve perfect focus with your lens, and you’ll want to concentrate at the brightest point in the sky. From there, you can move the focus ring on your lens until you see clearly defined shapes and then turn off live view when you finish.
Use a Longer Shutter Speed
Using a longer shutter speed alongside the widest possible aperture is how you capture enough light coming from the night sky to get excellent milky way images.
Your shutter speed shouldn’t be so long that the stars have time to move and cause blurry spots on your image, but there’s a quick calculation that you can do to find the optimal time, and it’s called the 500 Rule.
Using the 500 Rule
The 500 rule isn’t the only rule for calculating the correct shutter speed or exposure, and there are other methods called the 600 Rule and The NPF Rule. Each of these works a little differently, but the 500 Rule is one of the more conservative options, so you are sure to get good milky way photos.
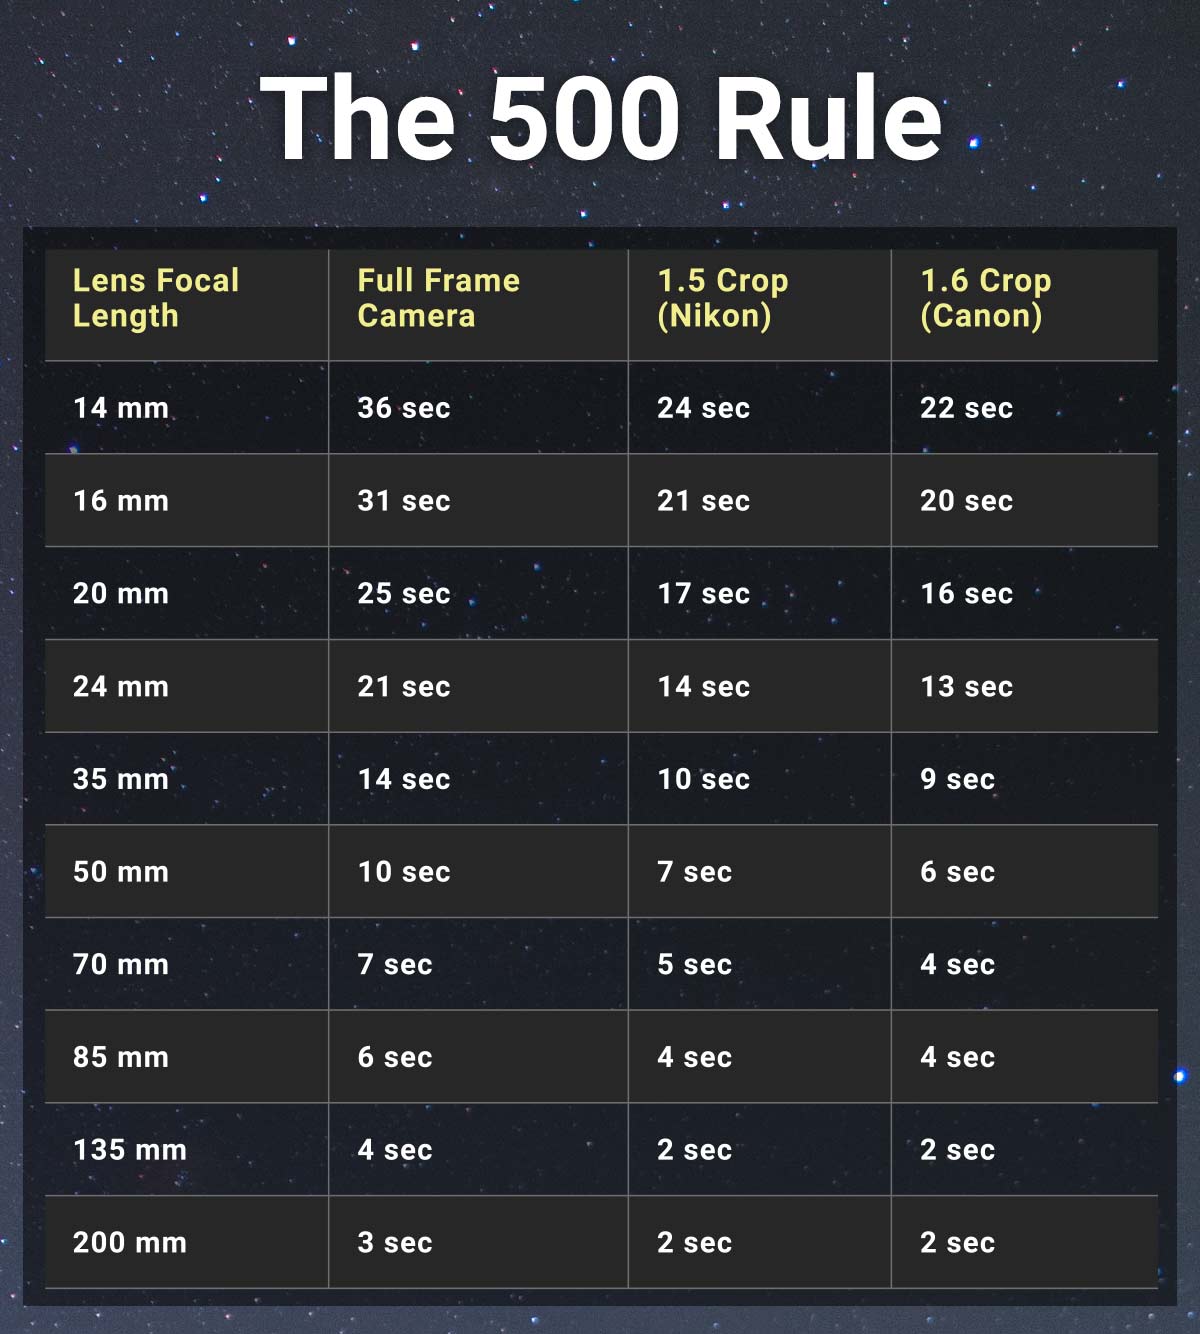
The formula for the 500 Rule is: SS = 500 / (CF x FL)
The SS stands for shutter speed in seconds, CF represents the crop factor or the ratio that exists between the megapixel sensor on your camera and a full-frame, and FL is the focal length expressed in millimeters.
Each type of camera will have a slightly different crop factor, and you’ll want to use ISO 3200 to start and shoot in RAW. The 500 rule will let you know how many seconds you can expose your image without the sky moving and causing blurring, and you can use live view to set the proper focal length using the brightest star in the sky.
A full-frame camera will work a little differently than crop sensor cameras like Canon and Nikon. The 500 Rule isn’t a perfect calculation, so you might want to use the seconds it indicates for your exposure time as a guideline. There are helpful charts online for the 500 Rule that show you the number of seconds for each camera type and focal length.
To make things even easier, though, you can take 500 and divide it by the focal length of the lens that you’re using. So, for a 16mm lens, you would take 500 and divide it by 16 to get 31.25, which is the maximum exposure length in seconds.
To be on the safe side, you might want to make your exposure time a few seconds shorter, and you can always make adjustments to the time either way based on the image you get.
Long Exposure Noise Reduction
Many digital cameras will have a feature called “in-camera long exposure noise reduction,” which is a useful, but often time-consuming function. The camera first takes a normal exposure of 30-seconds and then a second round that’s also 30-seconds but ‘blank.’
Once the camera has these two exposure images, it automatically compares them to find the digital noise and eliminate it. The downside to this process is that it does take time and battery power to perform, but it does work rather well for most applications.
If you are taking panoramas, this function will likely take too long to capture images of the milky without blurring, but the noise reduction is helpful for getting a clearer picture. You can also use software like Photoshop to perform noise reduction later, but it’s worth the 30-seconds to use the automatic function on your camera if you have the option.
Remember the Histogram
The histogram allows you to see the exposure level on your camera’s display so you can see if you need to adjust any of the camera settings before you begin. On the left side of the histogram, you’ll see the maximum values for darkness that your camera can pick up, and on the right are the white values.
There’s not much detail given on the screen, but if your image is underexposed, the histogram will show a marker on the left side of the graph. An overexposed image shows the peak on the right of the graph, and a neutral exposure displays a peak near the center. If the histogram shows a neutral exposure, you don’t need to perform any further adjustments.
White Balance, Screen Brightness, and Metering Mode
You’ll want to set your white balance manually so that you get the best possible color temperature on each milky way shot. For a lot of photography, a white balance of 4840K is a very pale yellow that limits the amount of brown in the shot and helps prioritize more of the blue in the image.
How you set your white balance will vary based on the amount of moonlight and other ambient light you are contending with, but you don’t have to worry much because when you use RAW image files, you’ll have the data you need to make adjustments later.
A Step by Step Guide for Photographing the Milky Way
Knowing how to photograph the milky way can save you time and effort while ensuring you get prepared for anything that might come up during your travels. Here is our step by step guide to milky way photography and some important tips to remember.
Show up Early, Set up Your Gear
It never pays to be late when you’re doing milky way photography, and no one wants to set up in the pitch dark if it’s avoidable. Granted, when you’re doing this type of photography, you will be working in the dark a lot, but when you get there ahead of the time you need to start to shoot the milky way, you can take your time setting up and get a test image or two in while you wait.
As you set up your location and gear, keep these tips in mind:
- Remove UV filters prior to shooting
- Light pollution filters are optional but can prove helpful
- Lens stabilization systems for this type of photography aren’t needed
- Temperature differences can cause condensation on your lens
Showing up early also ensures that you get to pick the ideal location for your image and choose where you want to set up for the best foreground additions and angle.
Exposure Times and Noise Reduction: Leave them On or Turn Them Off?
Regardless of the camera that you are using, you will likely suffer noise issues while you photograph the milky way. You can attempt to get a full-frame camera or another device that is better at reducing the amount of noise in your images, but most camera settings have an option that helps you shoot the milky way and other items in dark skies with less visual noise.
There are different types of noise, including luminance, thermal, chromatic, and hot pixels, and they tend to come up more when you’re using a higher ISO or warm temperatures. Even if you use a long exposure to get as much light as possible, you’re still looking at some considerable noise in your image, which is why you should leave the reduction feature turned on.
This feature takes two images and compares them so that the camera removes the noise automatically, and you can see a semi-final image. If you wish to shoot lots of sky photography, it’s essential that you get the best possible camera and lens combination that you can afford for the best performance.
One of the main drawbacks of this feature is that it takes twice as long to capture an image, and at night it’s crucial to have a short enough exposure time to avoid blurring the stars. This function also eats up the battery power of your camera, and if you’re taking time-sensitive shots of things like meteors or star trails, you should turn it off.
Always Shoot in Raw
When you shoot in RAW, you’re preserving all of the data recorded by the sensor on your camera, so the image is higher quality and more comfortable to correct in post-processing. A JPEG image doesn’t have this data, and it’s unrecoverable as the data gets compressed and ultimately lost when it’s stored.
Keep in mind that the image you see on the screen of your camera is a JPEG version of the image you took and not the RAW file version. This fact means that the histogram of the RAW file and what you see on the camera aren’t exactly the same.
Use a Short Focal Length
Another tip to follow when you’re planning out how to photograph the milky way is to use the shortest possible focal length to preserve the field of view and photograph the milky way in full.
Shorter focal lengths also help ensure you gather as much light as possible, and the lowest possible shutter speed combined with a maximum aperture and exposure time will guarantee you capture a milky way image that is full of light.
Shoot in Manual Mode
When you use your camera in manual mode, you have far greater control over the shutter speed, focal length, and other camera settings that allow you to get the best milky way image possible.
Automatic camera functions frequently miss the mark in milky way photography, and you’ll need to use a high ISO and freely adjust the white balance, aperture, and shutter speed, among other things. Without having this full level of control over your camera, your photo won’t have the proper exposure.
Use the Largest Aperture
It’s best to use the widest aperture possible when doing milky way photography, and if you can set it to the smallest f/ number, you stand a better chance of getting the best image. Anywhere from f/1.4 to f4 is acceptable, and it’s best to experiment until you find what works best with your equipment before the night of your shoot.
Focus at the Sky, and Double Check Your Focus
We’ve talked about focusing at the sky when doing milky way photography, but specifically, when you’re doing this you have two options:
- Set the focus to the Hyperfocal Distance
- Focus on a single star close to the center or core
PhotoPills has a helpful calculator if you don’t want to do the math to calculate the hyperfocal distance. Focusing on a single star is much easier and allows you to get extra sharp stars in your image and a tiny bit less sharpness on the rest of your subject.
Other tips for ideal focus include:
- Using the infinity focus on your lens
- Working on your focus skills during the day
- Use the Live View on your camera to zoom in and double check the focus
- Don’t be afraid of focus stacking
- Freely compose test shots to verify the picture is exactly the way you want it
- At night you’ll need to really turn up the ISO
- Watch your shutter speed to avoid Star Trails and use the 500 Rule or NPF Rule
If you double check your picture for the things on this list, you’ll avoid many of the primary pitfalls that plague most photographers attempting to capture the milky way.
Perfect the ISO
You should be using a really high ISO for your test shots, but you may need to adjust this setting further to account for the exposure triangle and the amount of noise produced by your specific camera.
Since you’ve already set the aperture and shutter speed as you set up, adjusting the ISO is the last step to help amplify the signal that the sensor on your camera picks up.
Setting the White Balance Level Manually
Higher-level cameras will allow you to manually set the white balance levels, which can significantly help you improve your images taken in different light conditions, including images of the milky way. To photograph the milky way, having full control over the white balance levels and using the histogram on the screen can help save you time editing the image later.
Light Painting a Landscape
Light Painting gives your milky way photo a sense of depth and adds shadows, so the picture appears more natural looking. You don’t have to alter the foreground in your images, but adding some lighting there can help the image feel more expansive, reduce harsh shadows, add vital contrast, and create a sense of place.
The Histogram and the Best Exposure
The histogram on your camera is what allows you to alter the exposure using settings like aperture, ISO, and shutter speed. When you get these settings right, your photo will look appropriately exposed and have excellent color without a grainy look.
Post Processing Tips and Tricks
Once you’ve captured the perfect milky way shots and you’re ready to begin processing your images, consider these tips as you get started. Although the process of editing your images will vary widely from one photographer to another, there are a variety of tutorials available online to help you with these steps.
Editing Your Milky Way Photography
Some images of the milky way will need more editing than others, and using software like Lightroom can make the process easier and faster. There are several ways to edit your images of the milky way, but in general, you’ll want to:
- Bump up the saturation to bring out the colors of the milky way
- Use noise reduction filters modestly at first
- Use the white noise functions to remove more brown and increase the blue
- Scan the image for vignetting and remove it
- Remove chromatic aberration (color fringing around objects)
Correcting white balance in post-processing is a reasonably easy task using the tools in Photoshop or Lightroom, but if you want more tools, Photoshop has a more significant number of features.
However, when you shoot images of the milky way in a RAW format, there is more data that is useful for changing the white balance available for these types of adjustments that get lost in JPEG format.
Capturing Inspiring Photos and Perseverance
Learning how to photograph the milky way is an adventure all on its own, but when you add on the need to venture out to a remote location, it adds a whole other layer of complexity. If you want to be an excellent photographer, you’ll need to persevere until you get that perfect shot and plan on overcoming equipment failures and other obstacles along the way.
Once you get to processing and editing your images, you can freely experiment with different effects and make adjustments as needed to the balance, saturation, and other characteristics.


